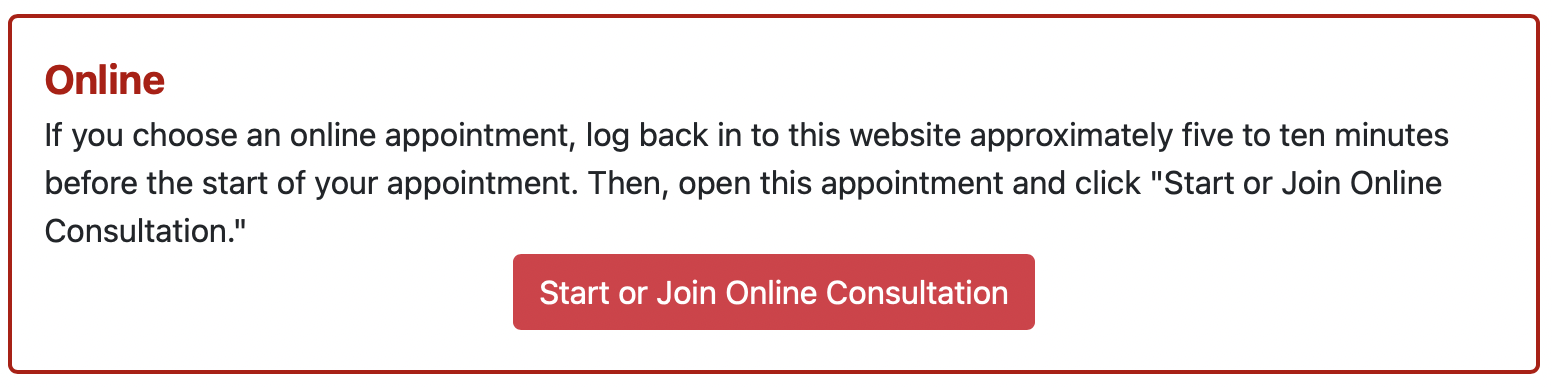
Once you've made an online appointment, you'll access that appointment through the appointment form. To get started, open the appointment in WCONLINE and then click on the "Start or Join Online Consultation" link that appears about half way down the page. Note that the link may be worded differently depending on other options in WCONLINE. Regardless, clicking the link will take you into the Online Consultation Module.
Introduction and Getting Started
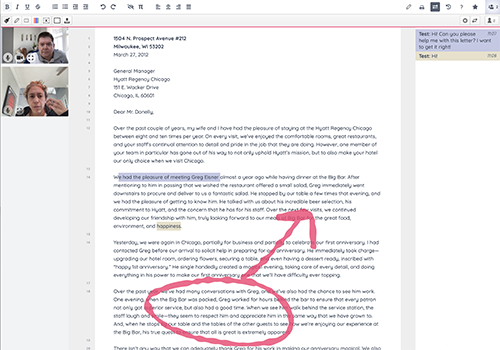 Once the Online Consultation Module opens, you'll see a screen with a toolbar and several columns. At the bottom right is the text chat. Click on the "chat" option to enlarge and use the chat area. You can "talk" to other participants by typing text in the chat interface. With "real time" enabled, other participants will see your chat text as you type, more closely mimicking a face-to-face conversation.
The large, white space in the middle is the shared whiteboard (where you can work on a text with others). The whiteboard opens with a brief description of the main features in the Online Consultation Module. In order to begin working with your own paper, either copy and paste your paper into the whiteboard or click the double arrow icon in order to import your own document into the whiteboard.
If audio/video is enabled, you'll be prompted to allow access to your camera and microphone when the Module first loads. The online consultation module displays a third column that contains your video (and the video from other participants) and offers a screen sharing option. Before video is shared, in most browsers on most devices, you will see a small black rectangle that has a few icons, including a video camera symbol. If you have not yet allowed access to your camera, click the video icon anytime to share your video. On a mobile device, you might need to minimize the text chat (by clicking on the "-" button) in order to see audio and video.
![]() At the top right of the screen, you'll see a participants icon that looks similar to the icon displayed here. The number shows the number of people currently in the online space. Clicking the icon will show you a list of all of the participants, and will give you the opportunity to update your name and change your authorship color. Changes that you make to the document will be shown in the selected color.
At the top right of the screen, you'll see a participants icon that looks similar to the icon displayed here. The number shows the number of people currently in the online space. Clicking the icon will show you a list of all of the participants, and will give you the opportunity to update your name and change your authorship color. Changes that you make to the document will be shown in the selected color.
Toolbar #1: Module Tools
![]() At the top or bottom right of your screen (depending on device), you'll find the Module Tools:
At the top or bottom right of your screen (depending on device), you'll find the Module Tools:
DRAWING TOOL: The pencil icon opens the Drawing Tool. Once clicked, you'll see a drawing area appear in a small square. Hovering over or tapping on that square (depending on the device you're using) will open the drawing area. As long as other participants in your session also open the drawing tool, they'll see whatever you draw via the paintbrush or pencil tool or whatever graphic you import via the import command. The other Drawing Tool toolbar icons let you change the color of your stylus, clear the drawing space, or make the background opaque (hiding the text underneath).
PRINT: The printer icon simply presents a prompt to print the text on the whiteboard (without other elements in the Module space, such as the text chat).
IMPORT/EXPORT: The two arrows icon opens the import and export menu. You can import any text-centric document into the whiteboard. Since the whiteboard is focused on text, documents which are just graphics or that utilize specialized programs (such as presentations) might not be able to be imported. In that case, copy and paste the text for the document into the whiteboard and/or attach the original document to your appointment (if file attachments are enabled). Once you've finished working on a document, the export options allow you to download the updated document onto your device.
TIMESLIDER: The clock icon opens the Timeslider. The Timeslider allows you to see how your document changed from the beginning to the end of your online session. Clicking "return to pad" will take you back to the main interface.
HELP: The question mark icon opens this help page.
STARRED REVISION: Clicking the star icon saves the current contents of the whiteboard as a starred revision. This means that you can see and access that revision in the Timeslider.
Toolbar #2: Formatting Tools
At the top or bottom left of your screen (depending on device), you'll find the Formatting Tools. Most of the tools, such as BOLD, ITALICS, UNDERLINE, STRIKETHROUGH, NUMBERED LISTS, BULLETED LISTS, INDENTS, UNDO, REDO, ALIGN LEFT, CENTER, ALIGN RIGHT, and JUSTIFY, mimic the functionality of similar icons and tools in word processors. The two remaining tools are defined below:
![]() REMOVE AUTHORSHIP COLORS: Changes that participants in a session make to the document in the whiteboard are highlighted in the color of the individual who made the change. The eye icon allows you to clear these authorship colors, returning the document to black text on white paper.
REMOVE AUTHORSHIP COLORS: Changes that participants in a session make to the document in the whiteboard are highlighted in the color of the individual who made the change. The eye icon allows you to clear these authorship colors, returning the document to black text on white paper.
MATH TOOL: The pi symbol opens the MathJax tool, which can be used to compose complex formulas for use in the whiteboard. More information on MathJax is available at the https://www.mathjax.org web site. Note that, for more freehand formulas, you can also using the DRAWING TOOL.
Toolbar #3: Video/Audio and Screen-Sharing Tools
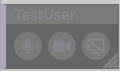 If audio and video is enabled and if you choose to allow the Module to access and broadcast your camera, then you'll see your video (and the video of other participants) in a column on the left of the screen. The video display also has three icons underneath:
MUTE AUDIO: The microphone icon allows you to mute or unmute the audio stream.
MUTE VIDEO: The camera icon allows you to mute (stop transmitting) or unmute the video stream.
VIDEO SIZE: The four brackets icon allows you to enlarge or reduce the size of the displayed video.
SCREEN SHARE: A screen-sharing option allows you to share an application or whole screen, replacing the video with a view of the shared screen. One or more participants can share their screen at once, and each individual's work on their own screen is displayed, live, in the screen-sharing view. Each individual can also switch between screen-sharing and video anytime.
POP OUT VIEW: Some browsers offer an additional option to pop out the video or screen-sharing view. In addition to the ability in any browser to enlarge the size of the video or screen-sharing view, you can first pop out the view and then expand the video/screen-sharing view to an even larger size.
Note that, in most browsers, you can also drag from the side or corner to expand the video or shared-screen view.
Closed Captioning
We have programmed the Online Consultation Module to work with browsers' accessibility tools, such as built-in closed captioning, the ability to zoom in and out, and other settings that can be selected in different browsers and browser versions.
Closed captioning is built into some browser and device settings, so a client or staff member can add it for their own meetings. An easy way to add closed captioning is to use Chrome's settings, which, once set to use closed captions, result in seeing text for the audio coming into your online meeting. In Chrome, click the three dots at the top right, choose "Settings," click "Advanced" and then "Accessibility," and toggle "Live Caption" on. You can also set preferences for captions. In an online meeting, closed captions will show up when the other person or other people is/are sharing their audio and speaking.
Since closed captions are not created by WCONLINE, their availability and accuracy may depend on other factors, such as the browser and version you are using, the quality of each meeting participant's internet connection, the speaker's ability to share their microphone, etc.
Questions and Troubleshooting
The FAQ section in this chapter (available at the bottom of this page) provides answers to common questions about the Online Consultation Module, including step-by-step instructions and recommendations across a variety of situations.
Sections in this Chapter
SECTION 1: Setting Up the Online Consultation Module
SECTION 2: Using the Online Consultation Module
SECTION 3: Synchronous Online Meetings: FAQ & Troubleshooting