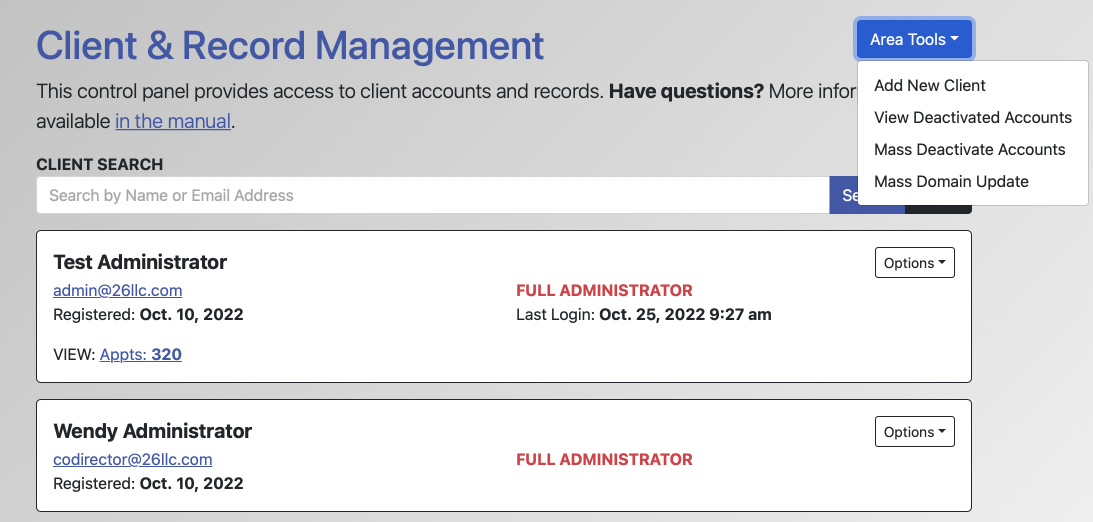
 Client and Record Management allows you to work work with the accounts that have been created on your system. Within WCONLINE, everyone who logs in to the system has to create an account by filling out your registration form (as defined in Form Setup: Registrations) or has to access an account that was created by an administrator for them. Within this control panel, you can manage the registration details of clients and administrators, modify a client's permissions to use the system, reset passwords, and work with and manage deactivated accounts.
Hover over the question mark icons within the control panel for more information about each configuration option. If you still have questions about a feature after having done so, find more information on that feature by going to the section in this chapter where that feature is located (as available at the bottom of this page).
The Client and Record Management control panel is available as the first "administrative option" of the Welcome menu. It's typically available to full and basic administrators, although basic administrators can't use the control panel to change a full administrator's password or profile, delete client accounts, mass deactivate client accounts, or perform a mass domain update.
- CLIENT AND RECORD MANAGEMENT OVERVIEW: This section describes the options within the overview page--the first page that is displayed when you open Client and Record Management. The overview provides access to all of the tools within the control panel and displays information about each client account.
- ACCOUNT OPTIONS: Available with the "Options" menu to the right of a given client account, these options let you set client-level options, modify a client's profile, manage a client's permissions, email the client, and view early alert notices.
- ADD NEW CLIENT: Available within the "Area Tools" menu at the top of the control panel, this tool lets you create an account for someone.
- MASS DEACTIVATE ACCOUNTS: Available within the "Area Tools" menu at the top of the control panel, this tool lets you deactivate a group of client accounts based on one of several criteria, such as when they last made an appointment or if they've graduated.
- MASS DOMAIN UPDATE: Available within the "Area Tools" menu at the top of the control panel, this tool lets you change the domains associated with all accounts--such as might be needed if your institution moved from @mycollege.edu to @myuniversity.edu domains.
- REMOVE MOBILE: If USE TEXT MESSAGING is set to YES in Global System Settings, administrators can use the search tool at the top of this control panel to search for and, by editing the client's account options via the "Options" menu, remove a client's mobile number. Clients with mobile numbers attached will also have an icon displayed by their name.
- VIEW DEACTIVATED ACCOUNTS: Available within the "Area Tools" menu at the top of the control panel, this tool will only show accounts that have been deactivated either manually or as a result of a no-show or late cancelation policy violation (as set in Global System Settings).
- ACCOUNTS WITHOUT CREDITS: If REQUIRE APPOINTMENT CREDITS is set to YES in Global System Settings, then WCONLINE will display a shopping-cart-with-an-x icon next to accounts that have run out of credits.
Sections in this Chapter
SECTION 1: Client and Record Management Overview
SECTION 2: Account Options
SECTION 3: Area Tools
SECTION 4: Mass Import Clients