Once you open Blackout Times Management (by selecting it via the "Area Tools" menu at the top of both the Calendar Display or the Standard Display), you'll see a schedule that looks nearly identical to the standard Calendar Display. In fact, the only difference between the Blackout Times Management display and the Calendar Display (apart from the introductory text at the top of the former's display) is that you see all of your staff and resources in the former, while the latter hides all staff and resources who are completely unavailable on a given day.
Like appointments, blackouts can only be created for times where there aren't existing appointments or blackouts already scheduled. This means that you'll first need to cancel any appointments that are already in place for where you now want to add a blackout. Also keep in mind that you'll want to use Holiday and Closures Management (accessed via the "Area Tools" menu in Schedule Management) to add full center closures. Finally, you'll typically work with blackouts only if you need to change an existing schedule. When setting up a new schedule, you'll use Starting Availability Management, as that tool sets your blackouts and staff and resource availability automatically. As with all control panels, be sure to hover over the question mark icons within the control panel in order to find suggestions and more information about each configuration option.
Creating a New Blackout
 Adding a new blackout allows you to cover available time for a staff or resource on your schedule. For example, if you have a staff person currently scheduled on Tuesday from 9am to 5pm, and if you wanted to take that person off of the schedule from 12pm to 2pm (as would be the case if they had to leave for another one-time appointment), you would add a new blackout from 12pm to 2pm in or to make that time unavailable for scheduling.
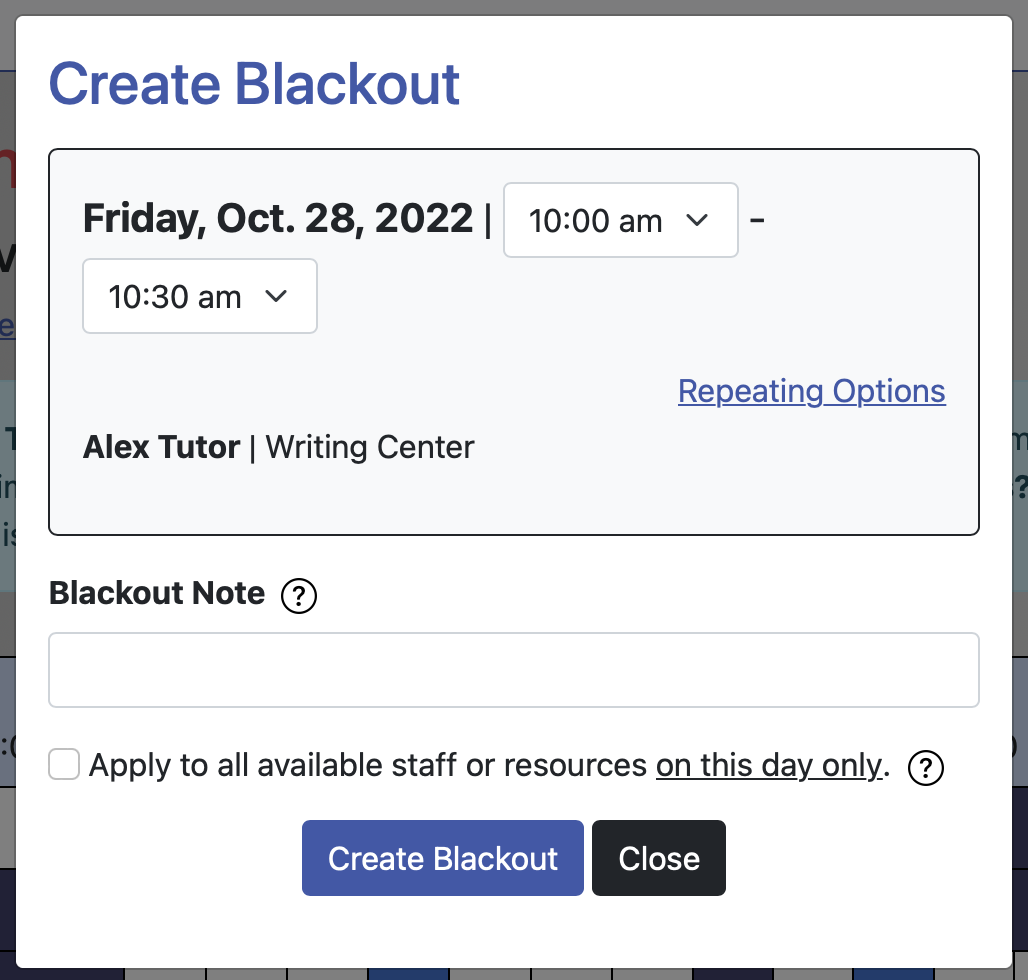
In order to add a new blackout, click on the white square that is wherever you would like the blackout to begin. In the example above, this means that you would click on the white square that begins at 12pm on Tuesday with that staff person. Similar to clicking on a white square on the standard schedule display, that will open a separate pop-up window titled "Create New Blackout." Filling out that pop-up form and then selecting the "create blackout" button will create the blackout on your schedule.
BLACKOUT DATE AND TIME: The day of the week, date, and time of the blackout are displayed. To change the length of your blackout, set the starting and ending time as needed. Remember that you are scheduling unavailable time--not the time that the staff or resource is available on the schedule.
REPEATING OPTIONS: If you need to blackout the same time period for the same staff or resource on multiple days or weeks, select "Repeating Options" to set the new blackout as a repeating blackout. Identical to the process for making repeating appointments, you'll then fill out the "repeat every" sentence by defining the frequency and type of the repeat (such as "every 1 week" or "every 3 days"), as well as the date that the repeating sequence should end.
Continuing with the example above, if you have a staff person currently scheduled on Tuesday from 9am to 5pm, and if you wanted to take that person off of the schedule from 12pm to 2pm every week through the end of the semester (as would be the case if they had to leave for a new class at that time), you would add a new blackout from 12pm to 2pm to make that time unavailable for scheduling. While doing so, you would set the repeating options to repeat the blackout every "one week" on "Tuesdays" through the last date of your current semester.
BLACKOUT NOTE: Blackout notes are simply notes about a blackout--such as why it was added or what a staff member might need to work on during this time. Blackout notes are not data in the sense that they are only available for viewing while looking at the blackout itself or when using the exported list of blackouts via System Data Export.
APPLY TO ALL AVAILABLE STAFF OR RESOURCES ON THIS DAY ONLY: At the bottom of the "Create New Blackout" window, you'll see a checkbox that begins with "apply to all." This option allows you to blackout this time slot for all of your available resources (such as to quickly make everyone unavailable for a staff meeting). If checked, the system will create an identical blackout for all resources who are available on this date and for the times that you specify. Note that this option cannot be used for multiple day or repeating blackouts and is meant for single, shared periods of unavailable time across all of your staff and resources on a single day.
Canceling an Existing Blackout
 Existing blackouts are canceled in the same way as you cancel existing appointments. From within Blackout Times Management, select the blackout that you want to remove. Then, select the "cancel" button. Once you confirm the cancelation, the blackout will be immediately removed from your schedule. Keep in mind that, since you are removing a period of unavailable time, that time will become immediately available on your schedule.
When adding blackouts manually, you have the option to repeat the blackout on multiple dates. Similarly, when using Starting Availability Management to set up your initial schedule, blackouts are automatically created that repeat from week to week. For repeating blackouts, the confirmation screen will present additional options for canceling the single blackout, all past and future blackouts that were made with this blackout, or all future blackouts that were made with this blackout as part of a repeating chain.
If you want to cancel the blackout only on the currently-selected day, select the "Confirm Cancelation" button. To cancel this blackout and all linked blackouts from the current day forward, check the THIS BLACKOUT AND FUTURE LINKED BLACKOUTS from the REPEATING BLACKOUT dropdown and then select "Confirm Cancelation." To cancel all of the blackouts that are linked to (and that were made with) this blackout, check the THIS BLACKOUT AND PAST AND FUTURE LINKED BLACKOUTS from the same dropdown and then select "Confirm Cancelation."
In continuing with the example above, if the staff member no longer had a class from 12pm to 2pm on Tuesdays, you could re-open that time slot by selecting the 12pm to 2pm blackout for that staff member on the date that they will be returning. Then, select "cancel" to go to the confirmation screen. Next, check the "future" dropdown option. Finally, click the "Confirm Cancelation." Once the cancelation is confirmed, WCONLINE will remove all of the 12pm to 2pm blackouts for that individual on the current and future Tuesdays, while retaining all those for previous weeks (when the individual was in class and unavailable).
Modifying an Existing Blackout
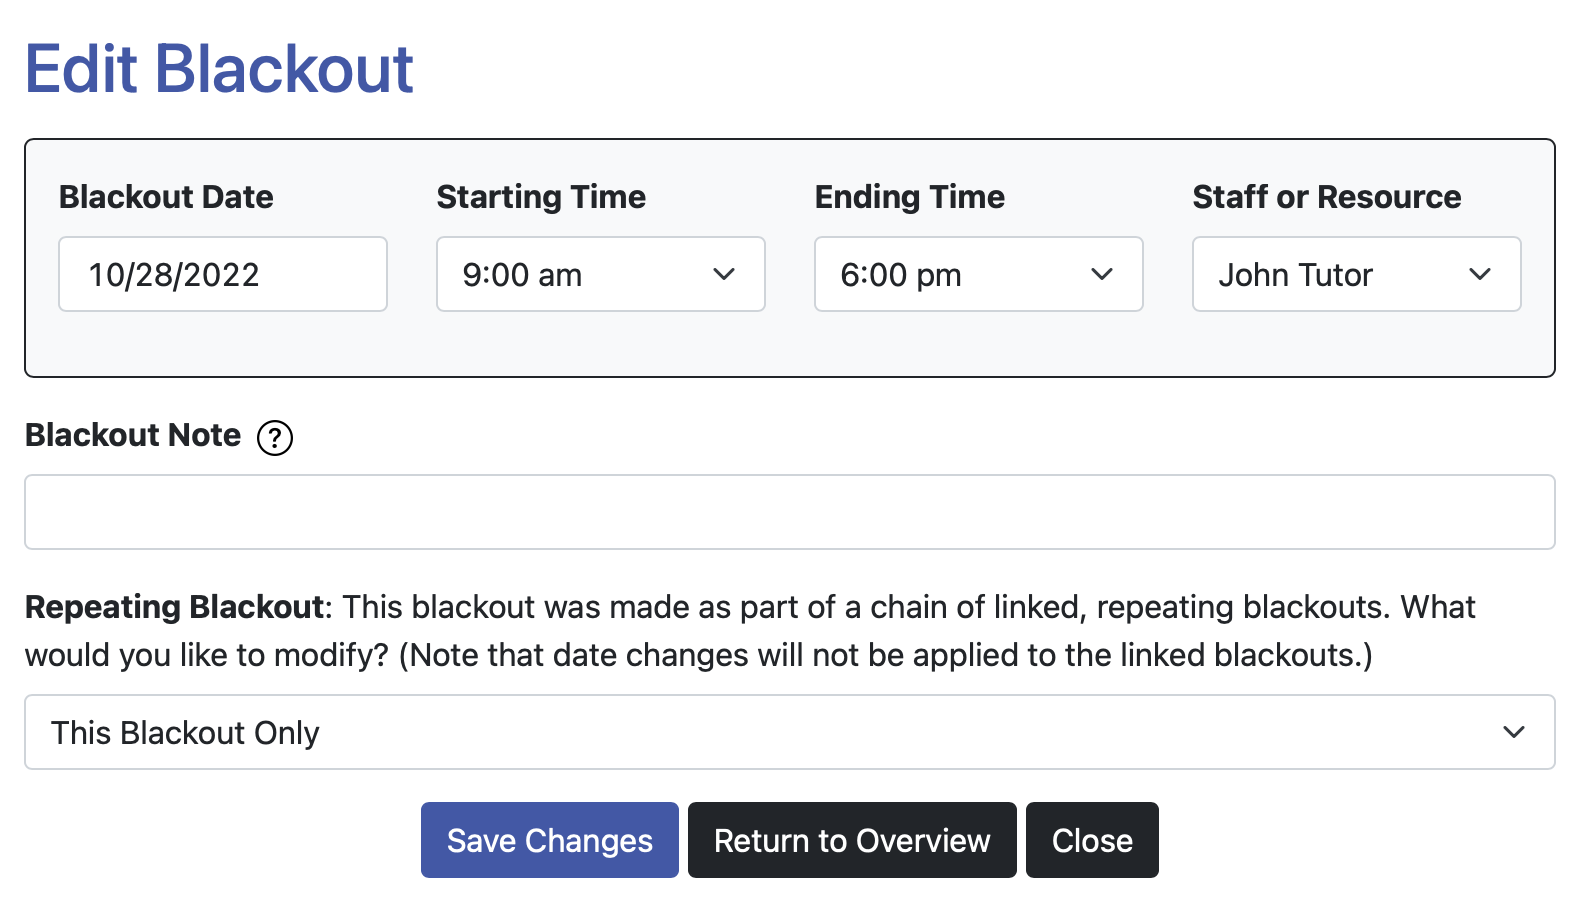 Existing blackouts are modified in the same way as you modify existing appointments. From within Blackout Times Management, select the blackout that you want to modify. Then, on the "Edit Existing Blackout" pop-up form, make the changes that you need to the following options. When finished, select "Save Changes." Once you save your changes, those changes will be immediately reflected on your schedule.
BLACKOUT DATE, STARTING TIME, ENDING TIME, and STAFF OR RESOURCE: The day of the week, date, and time of the blackout are displayed. To change the length of your blackout, set the starting and ending time as needed. To move the blackout to another staff or resource that has availability at the same time, change the staff or resource. Remember that you are scheduling unavailable time--not the time that the staff or resource is available on the schedule.
For example, if a staff member was currently set to be unavailable from 8am to 11am, and if you wanted to make them available beginning at 10am, you would do this by editing the blackout that runs from 8am to 11am. While doing so, you would change the ending time to "10:00am" before saving your changes.
BLACKOUT NOTE: Blackout notes are simply notes about a blackout--such as why it was added or what a staff member might need to work on during this time.
CREATED and LAST EDITED: When you first open an existing blackout, you'll find information on when the blackout was made and who made it. Additionally, if a blackout was modified, WCONLINE will also display the time and date of that modification, as well as who made the modification.
REPEATING BLACKOUT: When adding blackouts manually, you have the option to repeat the blackout on multiple dates. Similarly, when using Starting Availability Management to set up your initial schedule, blackouts are automatically created that repeat from week to week. For repeating blackouts, you'll see another option above the "save changes" button that allows you to change all linked blackouts.
If you want to modify only the currently selected blackout, select the "Save Changes" button. To modify this blackout and all linked blackouts from the current day forward, check the THIS BLACKOUT AND FUTURE LINKED BLACKOUTS from the REPEATING BLACKOUT dropdown and then select "Save Changes." To modify all of the blackouts that are linked to (and that were made with) this blackout, check the THIS BLACKOUT AND PAST AND FUTURE LINKED BLACKOUTS from the same dropdown and then select "Save Changes."
If you want to modify the blackout only on the currently-selected day, select the 'Save Changes' button. To modify this blackout and all linked blackouts from the current day forward, check the FUTURE radio button and then select 'Save Changes.' To modify all of the blackouts that are linked to (and that were made with) this blackout, check the PAST AND FUTURE radio button and then select 'Save Changes."
In continuing with the example above, if the staff member's class changed from 12pm-2pm to 12pm-1pm on Tuesdays, you could open the 1pm-2pm time slot by selecting the 12pm to 2pm blackout for that staff member on the first date on which the class ends by 1pm and changing the ending time to 1pm. Then, check the "future" option in the REPEATING BLACKOUT dropdown. Finally, click "Save Changes." WCONLINE will then adjust all of the 12pm to 2pm blackouts to end at 1pm for that individual on the current and future Tuesdays, while keeping all of the previously scheduled blackouts ending at 2pm.
Sections in this Chapter
SECTION 1: Adding, Modifying, or Canceling Blackouts
SECTION 2: Scheduling Changes: Step-by-Step Examples