In Module Setup: Early Alerts & Flags (which you'll find under the "System Configuration" section of the Welcome menu, you'll find a variety of options related to setting up an early alert or flag. Within WCONLINE, early alerts and flags are the same things, and are meant to notify an invested third party (such as a parent, counselor, advisor, or instructor) of a client's use of a center.
 Once an early alert or flag is configured for a given client, the third party receives an email alerting them to a client's new, modified, canceled, and/or missed appointment. Early alerts and flags can also be configured to send the third party a copy of the client report form when entered for the given client. A log of the sent alert is available within the "Account Options" attached to the client in Client and Record Management. Additionally, if an early alert has been sent for a client, the "alarm" icon will be displayed for the client also in Client and Record Management.
Alert Email
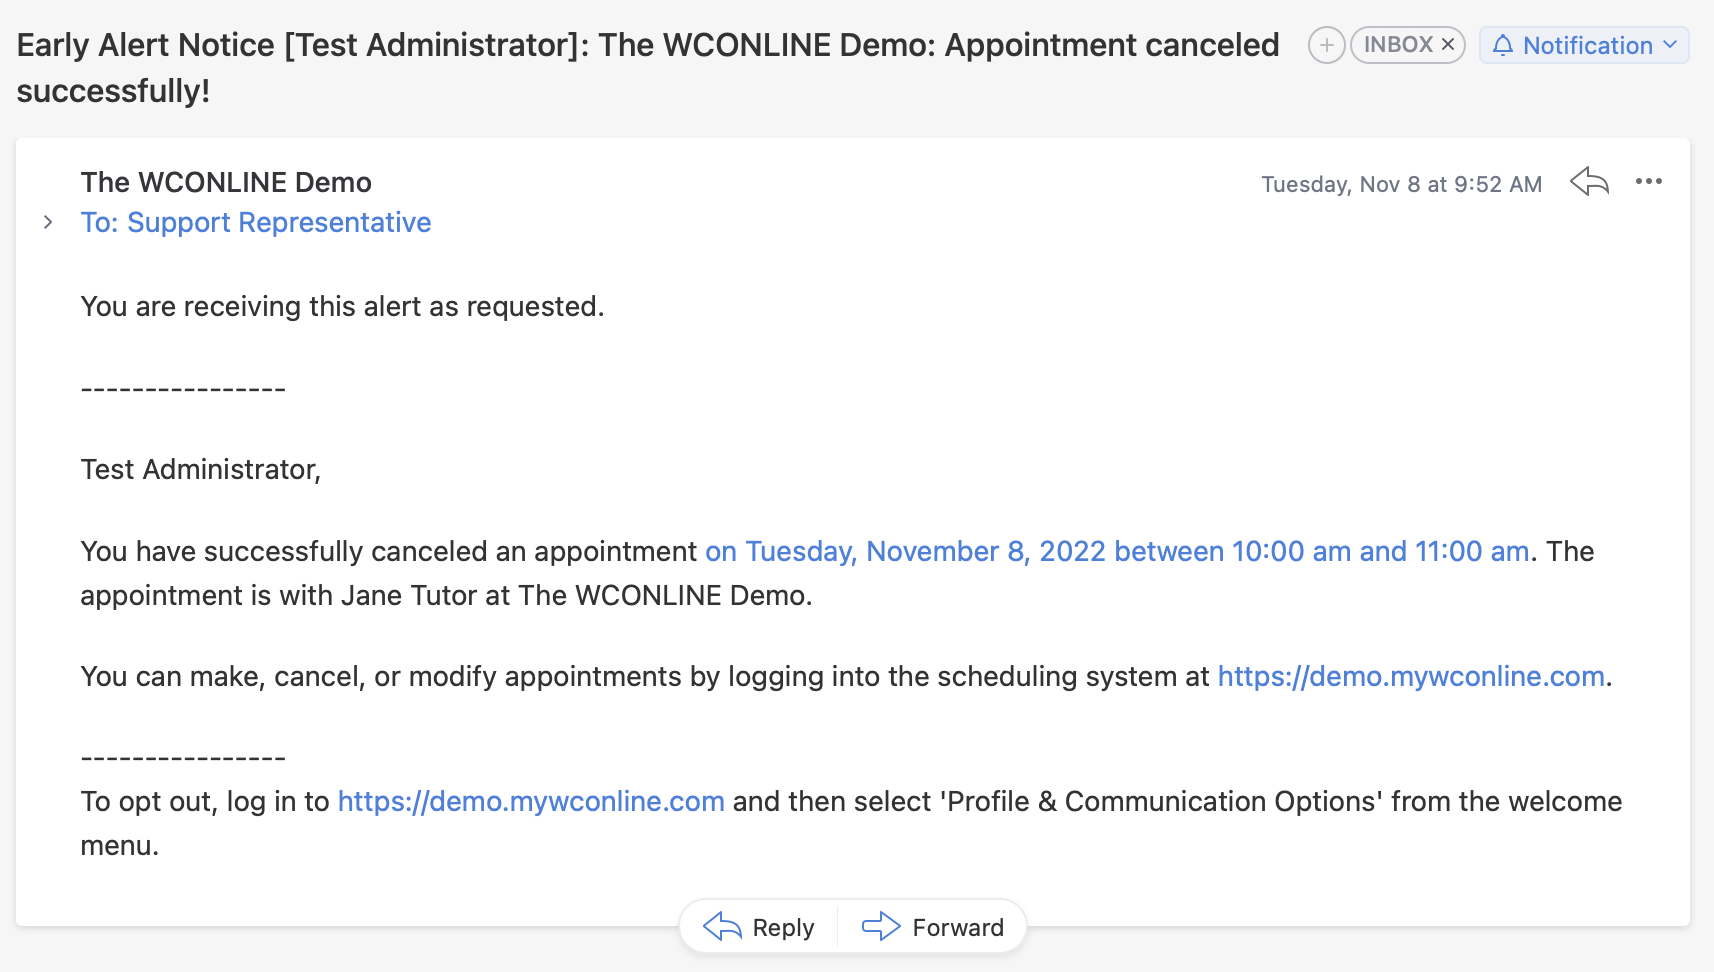
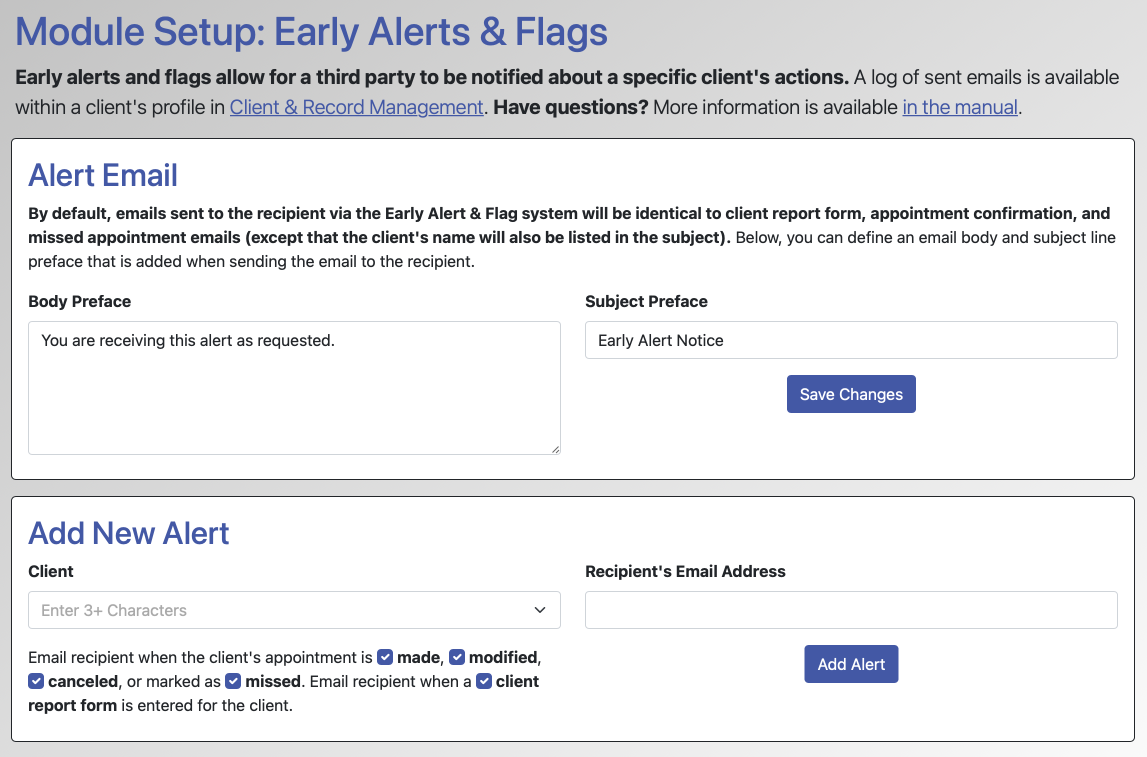 BODY PREFACE: By default, early alerts and flags are simply copies of the appointment confirmation, modification, and cancelation emails (as configured on a schedule-by-schedule basis in Schedule Management), of the no-show email (as configured in the "No-Show Policy and Enforcement" section of Global System Settings), and of the client report form email (as configured in Form Setup: Client Report Form). This field allows you to insert a preface or introduction before the copied email. This is often used to explain why the recipient is receiving the email.
SUBJECT PREFACE: By default, early alerts and flags carry the same email subject line as the original email that is sent to the client (with only the addition of the client's name). This field allows you to use a different subject line for the early alert emails. Whatever is entered in this field will be prepended to the original email subject line. Typically, this field is used to add something like "Early Alert Notice" to the start of the email's subject line.
Add New Alert
The "Add New Alert" section of the control panel allows you to create an early alert or flag. In order to add a new alert, fill out the form and then select "add alert."
CLIENT: This field records the individual whose appointments will result in an alert being sent. Search for an existing client simply by beginning to type a registered client's name or email address. If you want to add an alert to a client before the client has registered, enter the client's email address only and then complete the rest of the form.
RECIPIENT'S EMAIL ADDRESS: This field records the email address of the third party who is going to receive the alerts and flags. This field will accept a single valid email address.
EMAIL RECIPIENT WHEN...: These options allow you to define the actions that result in an early alert or flag email to be sent. For example, if an advisor only wants to know if a student misses an appointment, then you would keep only the "missed" checkbox selected.
Existing Alerts
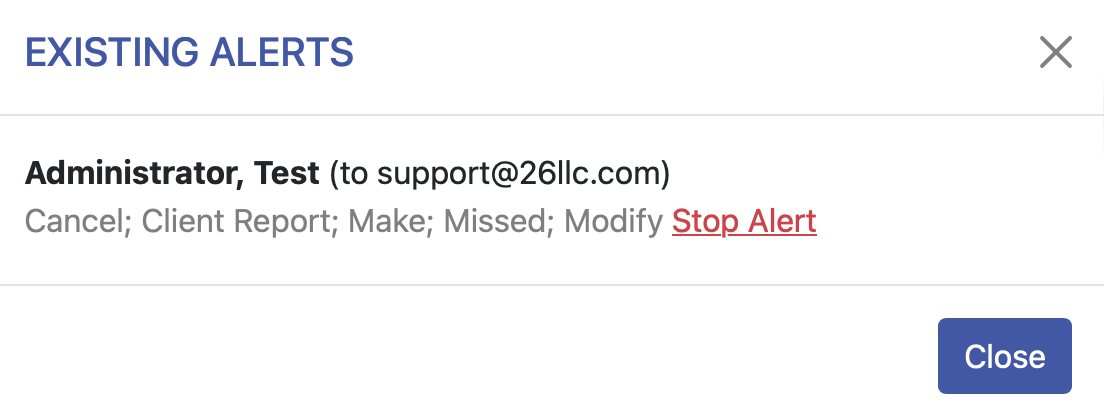 To view or mange existing alerts, select "Manage Existing Alerts" from the "Area Tools" menu at the top of Module Setup: Early Alerts & Flags. To stop an alert, select "Stop Alert" to the right of the alert. Stopping an alert does not affect the log of alert emails already sent (as mentioned above).If you need to change an alert (such as changing what emails are sent to a given individual), add a new alert for the same client and to the same recipient. The new alert will replace the existing alert.
Sections in this Chapter
SECTION 1: Early Alerts Setup and Use