Once you open Starting Availability Management (which you'll find under the "Schedule & Staff Management" section of the Welcome menu), you'll see a list of all staff and resources on your available schedules. Depending on the existing blackouts and appointments that a given staff or resource has, that Staff and Resource Overview will present varying options as discussed below. Choosing "Enter Starting Schedule" from the "Options" menu next to a staff or resource's listing lets you add a new schedule for that staff or resource. Choosing "Reset Availability," which is only available to full administrators, lets you clear a staff or resource's schedule from a specified date forward (removing all existing blackouts and appointments). As with all control panels, be sure to hover over the question mark icons within the control panel in order to find suggestions and more information about each configuration option.
Staff & Resource Overview
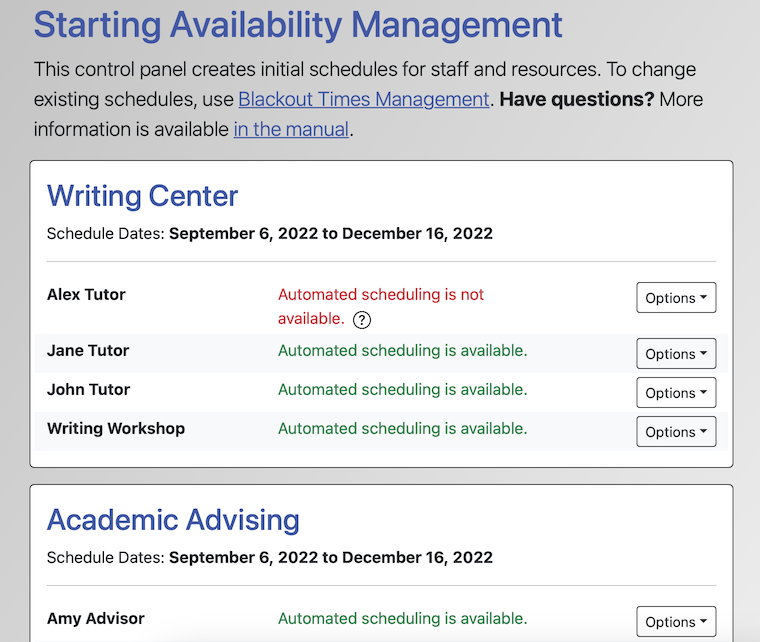 The Staff & Resource Overview screen shows all staff and resources that are currently attached to available schedules on your system. If you want to work with staff and resources that are attached to a schedule that has been hidden or archived, you'll first need to edit that schedule in Schedule Management to change its AVAILABILITY to something other than "Hidden/Archived."
Next to each staff or resource's name, you'll find a short statement that discusses the staff member's availability for automated scheduling through Starting Availability Management. Keep in mind that this control panel is only designed to enter a resource's initial, recurring schedule. In other words, it can only be used to enter a schedule where there are no existing blackouts or appointments (as blackouts cannot ever be scheduled on top of existing blackouts or appointments).
- AUTOMATED SCHEDULING IS NOT AVAILABLE: This statement means that the staff or resource already has appointments or blackouts through the end date of the schedule as set in Schedule Management or the end date of the staff or resource as set in Staff and Resource Management. In this case, you'll most likely want to edit the resource's existing blackouts in order to make scheduling changes.
- AUTOMATED SCHEDULING IS AVAILABLE: This means that the staff or resource was most likely just added and doesn't yet have any existing blackouts or appointments.
- AUTOMATED SCHEDULING IS AVAILABLE AFTER [DATE]: The date listed within this statement is the last date on which the resource has an existing blackout or appointment. This means that this resource can be scheduled through Starting Availability Management, but only for the period after the specified date forward.
To the right of the availability statement is the "Options" menu which gives you access to the following tools:
ENTER STARTING SCHEDULE: Once selected, this option will take you to the "Add Starting Availability" interface for this staff or resource (as described below).
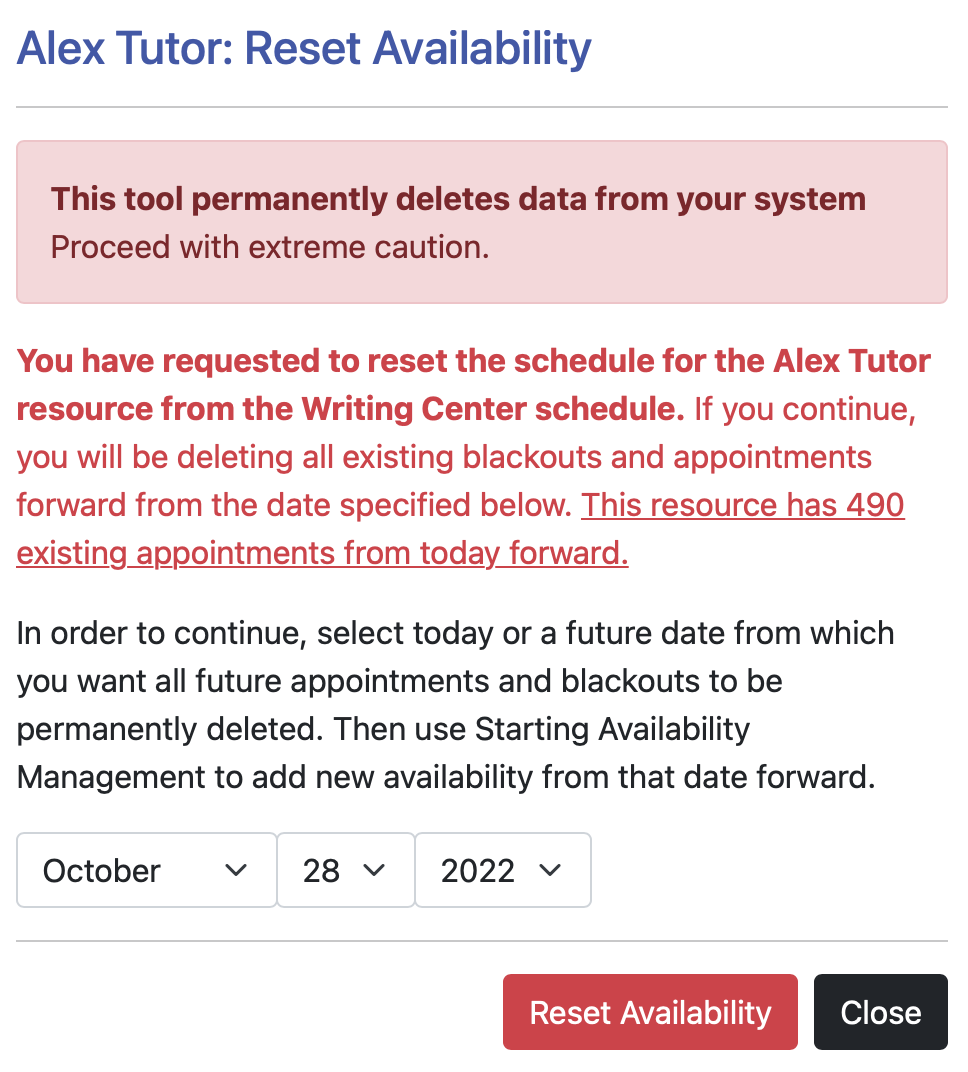 RESET AVAILABILITY: Once selected, this option gives you options for resetting, or clearing, a staff or resource's schedule from a specified date forward. This is useful if you have a staff member whose schedule has dramatically changed and who doesn't already have existing appointments scheduled. If a staff member does have existing appointments, you'll first want to edit those appointments and move them to another staff or resource. If you don't want to move the existing appointments, then you should individually cancel them (via the "cancel" button at the bottom of the appointment) to ensure that the client knows the appointment was canceled (since resetting a schedule in Starting Availability Management won't send cancelation emails).
Similar to other "delete" actions in WCONLINE, selecting the reset option will present explicit details about what will happen if you move forward. This includes a statement about the number of existing appointments (if any) that will be lost if you continue. As long as you have a reason for resetting a schedule and have dealt with any existing appointments as needed, you can move forward. To do so, set a date that is either today or in the future and then select "Reset Availability." WCONLINE will then automatically delete all appointments and blackouts from that staff or resource's schedule from the specified date forward. Once finished, you will be returned to the overview where you will now see options for installing a new schedule for that staff or resource.
Add Starting Availability
Once you select "Enter Starting Schedule" from the "Options" menu on the overview page, you'll be presented with a chart that shows a given week of the selected staff or resource's schedule. At the top of the grid, you can specify a date range for the schedule installation. Typically, you won't need to change the listed date as it's automatically set to the date range of your schedule.
- Across the top of the chart are the days of the week. Days that appear in red (with grayed out times) are CLOSED DAYS of the week as set in Schedule Management. (If you're using A/B scheduling, the top row will show A and B days, as discussed at the bottom of the chapter overview.)
- Down the left side of the chart are the times that are available for scheduling based on your schedule's setup in Schedule Management. For example, if your schedule begins at 9am and is set to thirty minute increments, you'll see 9:00, 9:30, 10:00, etc. down the side. (If you're using slot scheduling, the left side will show slot numbers, as discussed at the bottom of the chapter overview.). The times represent the starting time of an appointment. This means that a time slot labeled 2pm would start at 2pm and run until the next displayed time (such as 2pm to 3pm on a schedule that has one hour increments).
- The remaining squares on the chart show whether or not a given staff or resource is available for that slot on a weekly basis on your schedule. If a square is checked (and appears in your unavailable or blackout color), then that means that the staff or resource does not work at that time on that day. If a square is unchecked (and appears in white), then that means that the staff or resource does work at that time on that day.
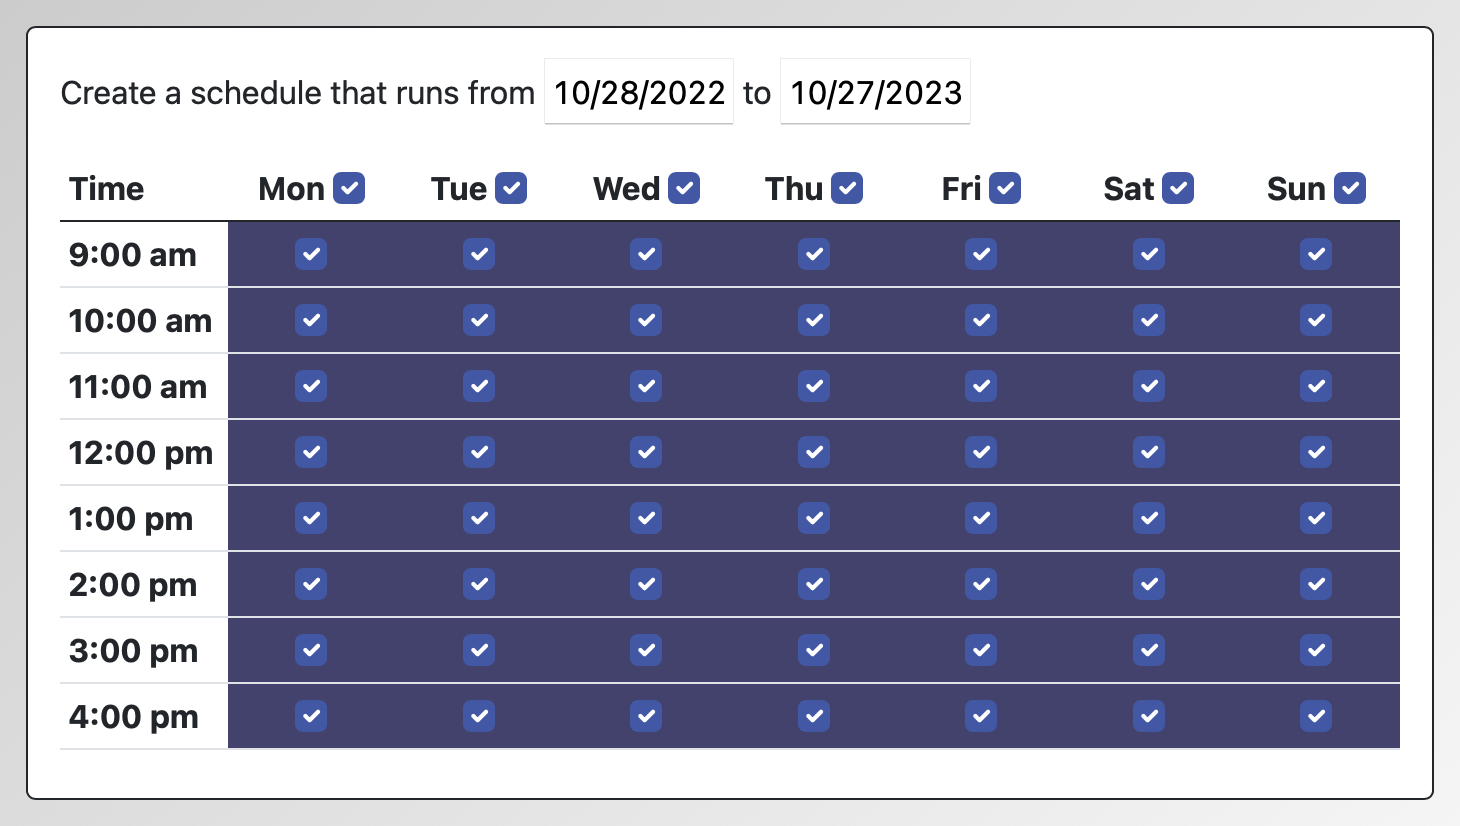
To add a weekly, recurring schedule for a given staff or resource, uncheck the boxes that show the times that the resource can work and then select "Install Starting Schedule." For example, if a given staff member works Mondays and Wednesdays from 9am to 11am and Thursdays from 1:30pm to 2pm (and assuming your schedule is set to thirty minute increments), you would uncheck the boxes across from 9:00am, 9:30am, 10:00am, and 10:30am underneath both "Mon" and "Wed" You would also uncheck the boxes across from 1:30pm underneath both "Tue" and "Thu." Once done, you would select "install this schedule" and WCONLINE would set up the schedule for that staff person to run every Monday and Wednesday from 9am to 11am and every Tuesday and Thursday from 1:30pm to 2:00pm.
To select multiple times at once, click on the beginning of the block of time, hold down your "shift" key, and then click on the end of that block of time. For example, if you want to select all times on Monday from 10am to 2pm, uncheck the 10am checkbox. Then, hold down your "shift" key. Next, while still holding down your shift key, uncheck the 1:30pm checkbox. WCONLINE will uncheck all checkboxes that are between 10am and 2pm automatically.
Sections in this Chapter
SECTION 1: Using Starting Availability Management