Once you open the Master Listings Report (which you'll find under the "System Utilities & Reports" section of the Welcome menu), you will be presented with a list of data that is contained within your WCONLINE site.
The data that is initially displayed is determined by how you access the report. For example, if you access the report via the Welcome menu link, you'll be shown appointment details for the next week's worth of active appointments. On the other hand, if you access the report from a link within one of the other control panels (such as Client & Record Management, Schedule Management, or Staff and Resource Management), then you'll be initially shown data related to what you selected. For example, if you select on "No-Shows: 1" under someone's name in Client and Record Management, then you'll be presented with a list of that client's no-shows.
Configuration Options
At the top of the Master Listings Report, you'll find several options for configuring the report. Once you make changes to the available options, select the "Update Report" button to update the report itself using your selections. If you want to return to the default display, select "Reset Report."
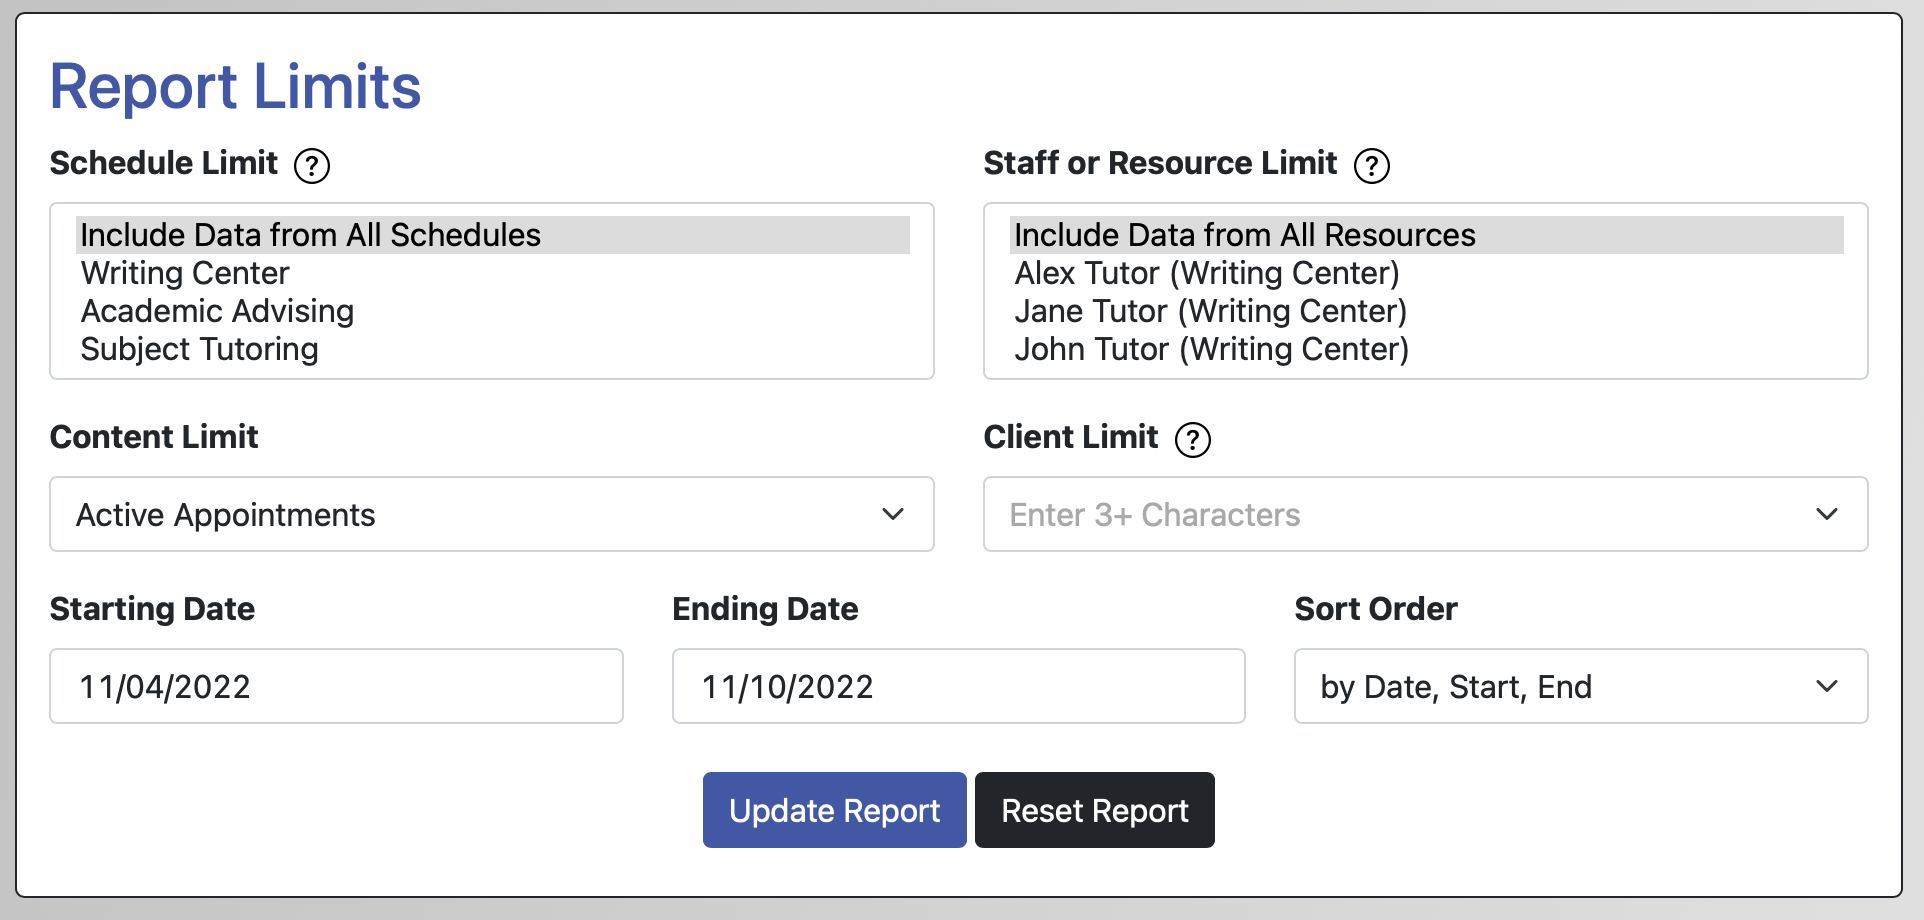
SCHEDULE LIMIT: By default, the Master Listings Report presents data from across all of your currently available schedules. This field lets you limit the report to one or more specific schedules. Note that only schedules that have an AVAILABILITY of "Available to Everyone" or "Available to Administrators Only" (as set in Schedule Management) will appear in this list. Choose more than one schedule by holding down the command or control key as you select schedule names.
STAFF OR RESOURCE LIMIT: By default, the report runs against all of the staff or resource attached to all schedules or to the selected schedule. If you want to see data for just a single staff or resource, select that staff or resource from the list. Choose more than one staff or resource by holding down the command or control key as you select names.
CONTENT LIMIT: This field defines the data that you want to see in the report. For extensive information about this setting, review the "Understanding the Report" section below.
CLIENT LIMIT: By default, the report runs against all clients attached to all schedules or to the selected schedule. If you want to see data just for a single client, begin typing the client's name or email address in this field and then select the client from the resulting display.
STARTING DATE and ENDING DATE: These limits define the dates for which the report runs. The report will show data between (and inclusive of) the starting and ending dates set here.
SORT ORDER: If you're using any of the active appointment-based CONTENT LIMIT options (such as "Active Appointments," Online Appointments," and "Missed/No-Show Appointments"), then you'll see an option that lets you define how the presented data is sorted. By default the report shows all data sorted by appointment date and then by starting and ending time. This option gives you the ability to sort first by resource, then by date, and then by starting and ending time.
Understanding the Report
Beneath the configuration options in the Master Listings Report, you'll find the report itself. Depending on the CONTENT LIMIT you select, the report will present a text-based list of system data. At the bottom of the report, you'll find the total number of records displayed.
Appointment-based Displays
For the appointment-based displays below, selecting "View Appointment" from the "Options" menu will open the specified appointment. If "View Client Report Form" is displayed in the "Options" menu, that means that a post-session client report form was added for the appointment and can be viewed by selecting that option. Or, if "Add Client Report Form" is listed, meaning the appointment does not have a client report form, you or your staff can click to add a client report form for that appointment. Selecting a client's name will show you the client's registration profile. If the appointment was an online appointment, selecting "ONLINE" will open the attached online session. And, if files were attached to the appointment, selecting the file will allow you to download the file attachment from the report itself.

ACTIVE APPOINTMENTS: Active appointments are appointments that have not been canceled or marked as no-shows.
ETUTORING APPOINTMENTS ONLY: eTutoring appointments are appointments for which the client has selected "eTutoring" as the meeting type when making the appointment. If you've relabeled "eTutoring" in the "Language Options" section of Global System Settings, then this option will appear in your chosen term.
MISSED/NO-SHOW APPOINTMENTS ONLY: Missed appointments are those appointments that have been marked as "missed" by an administrator. An administrator does this by checking the "No-Show / Missed" checkbox at the bottom or by selecting "Mark as a No-Show" from the "Appointment Tools" menu at the top of a given appointment form. Once an appointment is marked as "missed," it will be hidden from display on the schedule; however, you can still find the appointment here. If an appointment was accidentally marked as missed, and assuming that the time slot is still open on your schedule, you can restore a missed appointment by opening the appointment from this list, editing it, unchecking the "No-Show / Missed" checkbox, and saving your changes. (If this was an appointment that deactivated an account, you will likely also choose to reactivate the client's account in Client & Record Management.)
ONLINE APPOINTMENTS ONLY: Online appointments are appointments for which the client has selected "online" as the meeting type when making the appointment. If you've relabeled "online" in the "Language Options" section of Global System Settings, then this option will appear in your chosen term.
ORPHAN APPOINTMENTS ONLY: Orphan appointments are appointments for which a post-session client report form has not been added. Displaying orphan appointments allows you to quickly see if a staff member has forgotten to enter post-session reports for some of their appointments. Staff add client report forms by selecting "Add Client Report Form" in a given appointment's "Options" menu. Note that missed or placeholder appointments won't be included in this list. And, if you've relabeled "Orphan" in the "Language Options" section of Global System Settings, then this option will appear in your chosen term.
PLACEHOLDER APPOINTMENTS ONLY: Placeholder appointments are appointments that have been marked as a "placeholder" by an administrator. An administrator does this by checking the "Placeholder" checkbox at the bottom of the appointment form.
WALK-IN APPOINTMENTS ONLY: Walk-in appointments are appointments that have been marked as a "walk-in/drop-in" by an administrator. An administrator does this by checking the "Walk-in / Drop-in" checkbox at the bottom of the appointment form.
Other Displays
CANCELED APPOINTMENTS ONLY: Canceled appointments are those appointments that were made, but later canceled. This display shows information on the cancelation (such as who canceled the appointment and when it was canceled). As long as the time slot is still available on your schedule, you can also restore (or "uncancel") the appointment by selecting the "restore" button.

CLIENT REPORT FORMS: Client Report Forms are the post-session reports entered by staff after meeting with a client. Similar to the appointment-based displays, this option presents a list of client report forms within the specified configuration options and allows you to view the client report form (or appointment) via link. This list also includes Off-Schedule Client Report Forms.
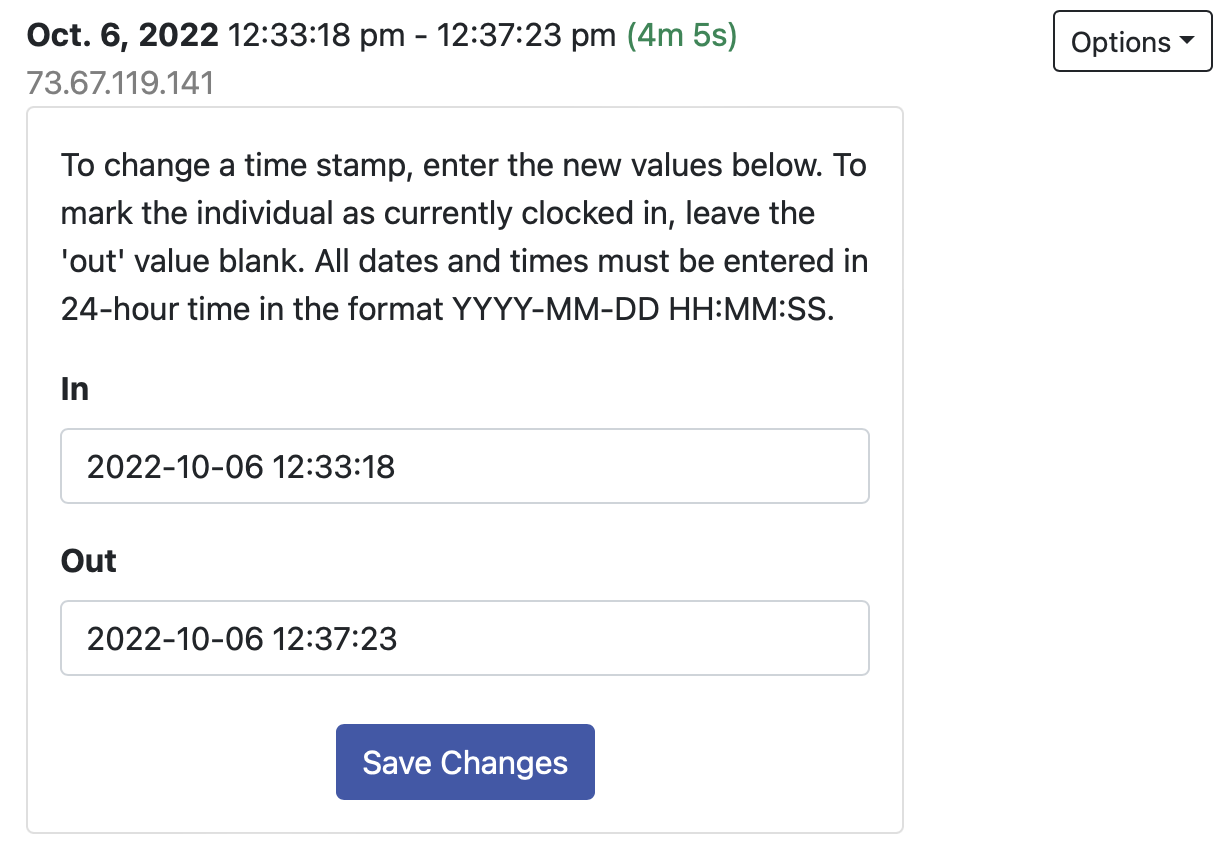 TIME CLOCK DATA: If you are using the Time Clock, this option presents the clock-ins and clock-outs across the specified configuration options. Specifically, the report shows the client's name, the date and times that the client has clocked in and out, whether or not they're currently clocked in, and the elapsed time between each clock-in and out time. You can also edit or delete a specific entry using the options within the "Options" menu. And, even if clocked in while working with the report, you can clock clients in using the "Add Clock-In" button above the list of time clock data. If a client is clocked in, the "Options" menu next to their time clock listing contains a "Clock-Out Entry" option. Note that the entire "Time Clock Data" report is typically only available to full administrators unless you've given basic administrators access.
WAITING LIST DATA: If you are using the "Waiting List" (as set in Schedule Management) to allow clients to be notified of an opening in the schedule, this option presents a list of those clients currently on the waiting list for each day and schedule. The display also includes the date and time the client joined the list, the limits they selected when doing so, and whether or not the client made an appointment after joining the waiting list for a given day. If one or more clients made an appointment after joining the waiting list, the report shows a subtotal, such as "6 clients successfully made an appointment after joining the waiting list for a given day."

Sections in this Chapter
SECTION 1: Using the Master Listings Report