Using Form Setup: Client Report Form (which you'll find under the "System Configuration" section of the Welcome menu), you'll define the questions that appear on the client report form. The client report form is the post-session report typically entered by a staff member after meeting with a client. While the client report form can be emailed to anyone, clients (non-administrators) do not have direct access to client report forms. As with all control panels, hover over the question mark icons for more information about each configuration option.
Like the registration, appointment, and survey forms, the client report form is limited to a total of twenty questions. For more information on the forms and their use (as opposed to the setup of the forms), read the manual entry on "client report forms."
Client Report Form Email
While administrators are the only individuals who can enter and see post-session client report forms, those forms can be emailed to the client, staff or resource, or WCONLINE site administrator (as defined by the CENTER EMAIL ADDRESS in Global System Settings). The "Client Report Form Email" section of Form Setup: Client Reports lets you define those emails, as well as the information from your client report forms that is included on those emails.
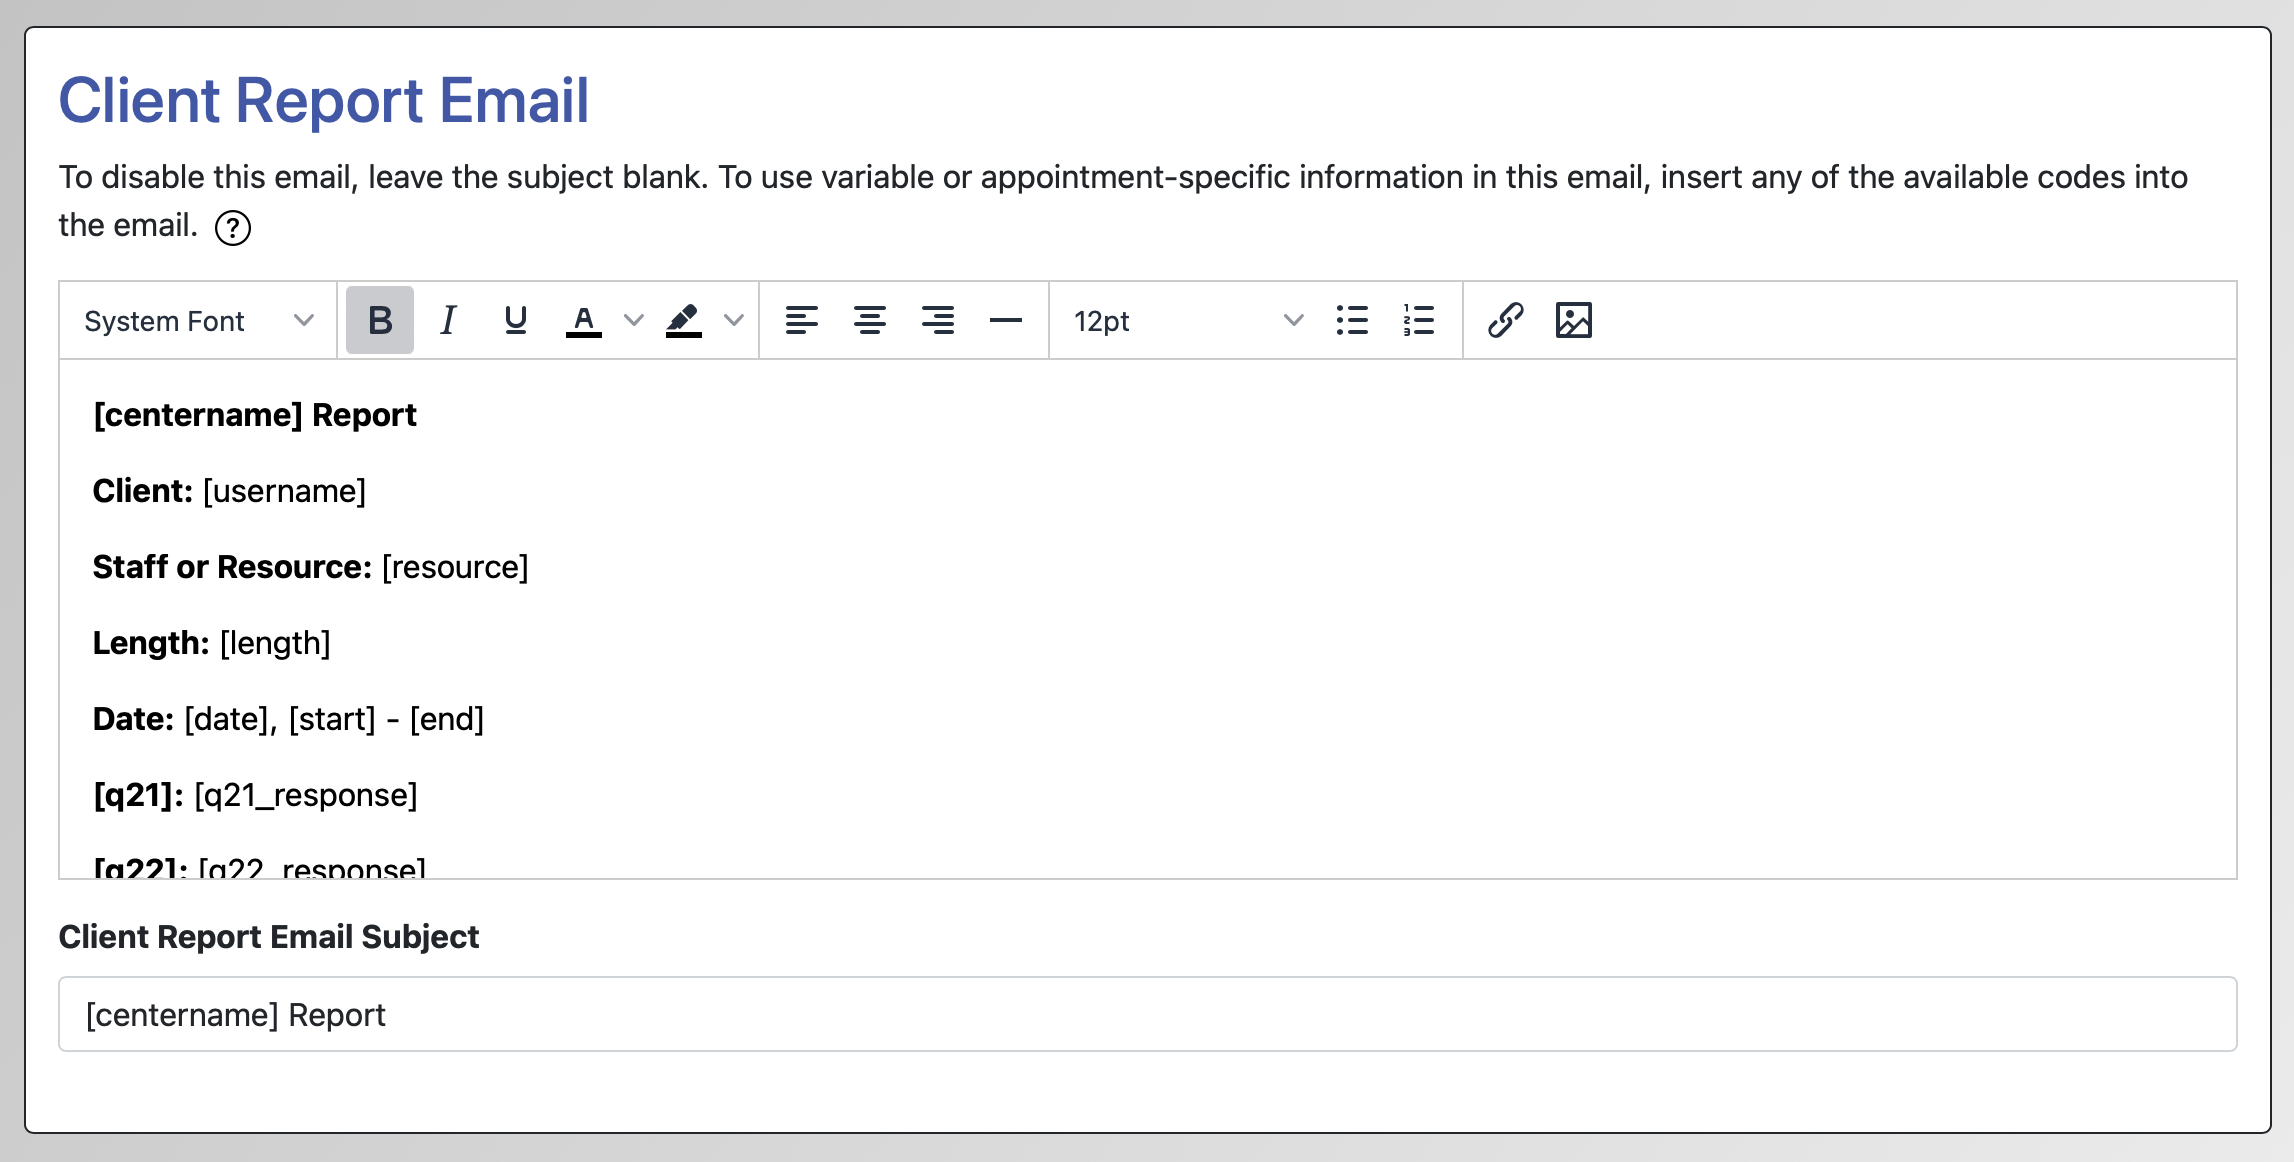
EMAIL BODY is where you'll compose the body of the email message that is sent when the client report form is emailed out. Typically, centers include a salutation, some introductory text that explains why the recipient is receiving this report, specific data fields from the client report form, and a closing. EMAIL SUBJECT is where you'll enter the subject line for the outgoing email.
Like most emails within WCONLINE, the system provides several "Available Codes" that you can use within the subject and body of the email. Those codes, available by hovering over the question icon near the introductory text, are replaced with non-static information. For example, if you enter [date], that code is replaced with the date of the appointment. The client report from email can also contain questions and answers from the client report from itself. To add a question and answer, enter [qXX] for the question and [qXX_response] for the answer to that question. When doing so, replace "XX" with the number that appears to the right of the "Question" label in the list of in-use questions in Form Setup: Client Report Form.
As an example, assume that you collect "Instructor's Full Name" as "Question #3 [q23]" and "Assignment" as "Question #12 [q72]," and that you wanted to be able to send a quick confirmation to instructors when one of their students meets with a staff member at your center. To do this, you would set your EMAIL BODY to something like:
Dear [q23_response],
We're writing to let you know that [username] met with [resource] on [date]. The meeting lasted [length] and focused on:
[q72]: [q72_response]
As always, if you have any questions, please reach out to our center directly.
Client Report Form Questions
In addition to the questions that you define, the client report form will always show the client's name and the appointment's date and time (from the appointment form). The client report form will also always collect the actual appointment length (in case the appointment lasted more or less time than was scheduled) and the staff or resource (in case a different staff person is completing the client report form. If entering an off-schedule client report form (to collect data on a session that was held outside of your normal schedule opening hours), the form will also require the staff member to complete the client's name and the appointment date and time fields (since off-schedule forms aren't attached to appointments).
To edit an existing question, make changes to the question as it appears within Form Setup: Client Report Form. To add a new question to the form (up to the twenty question limit), use the NEW QUESTION section located at the bottom of Form Setup: Client Report Form.
![]()
QUESTION: This field lets you define the question as asked on the client report form.
POSSIBLE ANSWERS: This field lets you define the type of answers or the answer choices available when answering the corresponding question. Be sure to review the informational box above the question configuration options for extensive information about the various answer types. The client report form offers fill-in, drop-down, checkbox, multiple checkbox, Likert, and large text area answers. In addition, one question can be set as an "automatic email" question, allowing client report forms to be emailed simply by selecting an email address from a list of emails.
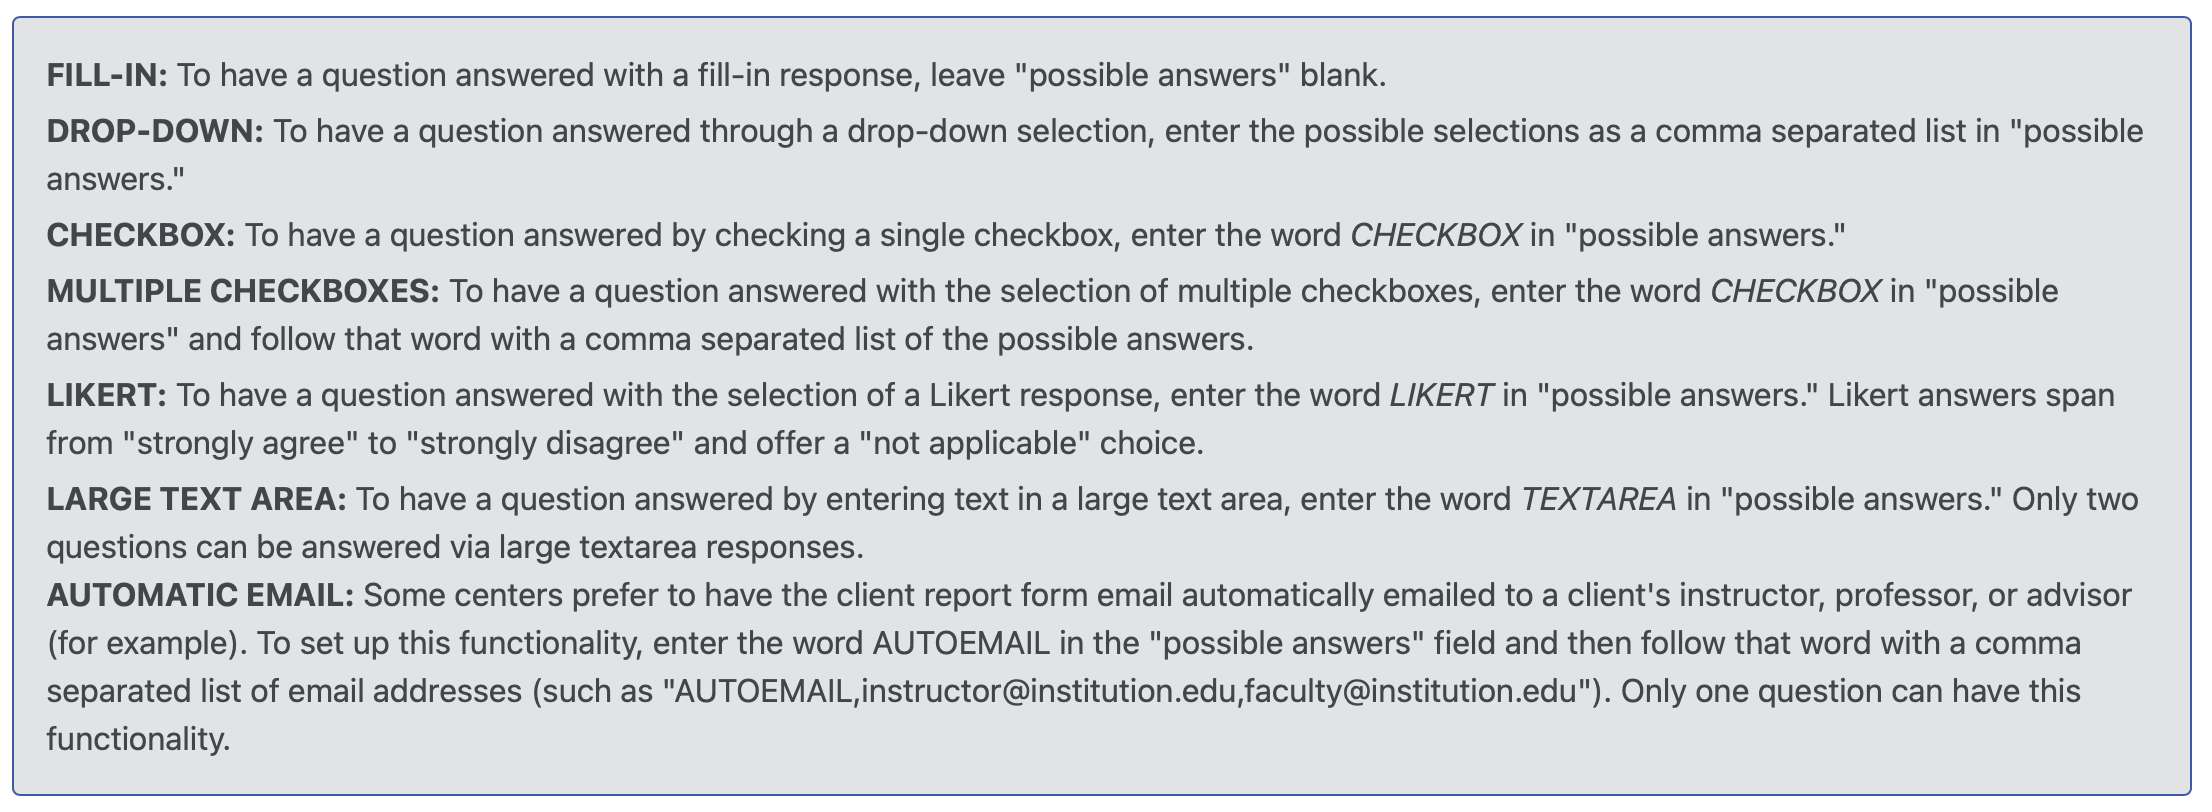
The client report form's POSSIBLE ANSWERS includes some special functionality that isn't supported by other forms in the system. Specifically, the "fill-in" answer type supports a response that begins with http:// or https://. This allows you to ask something like, "Please provide a link to the Google or Dropbox document" and have the answer be selectable on the client report form and within the client report form email. Additionally, using "AUTOEMAIL" at the start of a list of email addresses (such as "AUTOEMAIL,instructor@institution.edu,faculty@institution.edu") allows you to automatically email a new client report form to the selected email address.
REQUIRED? This field lets you set whether or not a staff member has to complete the corresponding question in order to save their client report form. Note that, unlike most other forms in the system, administrators do have to complete required fields on the client report form as administrators are the only individuals who can enter client report forms.
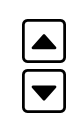 ORDER ON FORM ARROW ICONS: These icons let you change where questions appear on your client report form. Once staff have begun entering client report forms on your system, you'll want to use the these icons to change the question order, as your data is tied to the specific question (Question #1, #2, etc). For more on why this is important, review our recommendations on making changes to your forms. To move a question up on the form, select the "up" arrow. To move a question down, select the "down" arrow.
View Form Options
 By default, client report forms include options that are convenient for nearly all centers. For example, there are checkboxes for an administrator to choose to email the client, resource, and center address, so the administrator filling out the form can choose one or more of those boxes and to share the client report form email with one of those individuals. A few centers choose to change the way the client report form's options work. Therefore, several additional, but not commonly-used, options are available by selecting "View Form Options" from the "Area Tools" menu at the top of Form Setup: Client Report Form.
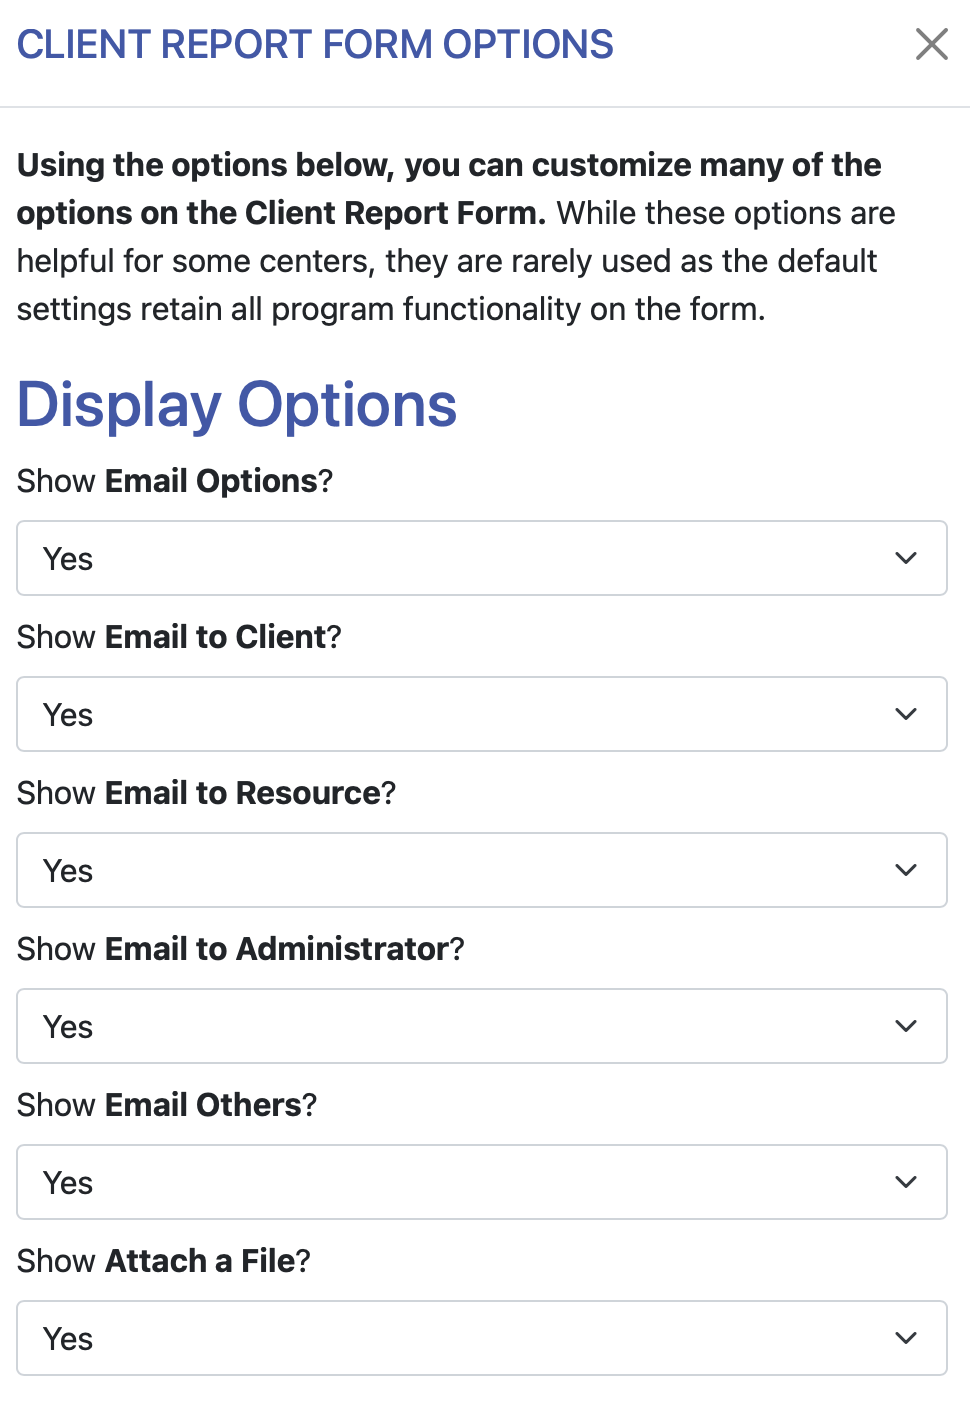
Display Options
SHOW "EMAIL OPTIONS": Regardless of other selections under the next four "Display email..." options, choosing "No" here removes the email options from the client report form, and also removes the "Email Options" and "Send Email" button from existing client report forms, so that no emails can be sent out.
SHOW "EMAIL TO CLIENT": Choosing "No" removes the "Client/Student" checkbox as an email option.
SHOW "EMAIL TO RESOURCE": A "No" removes the "Staff/Resource" checkbox as an email option.
SHOW "EMAIL TO ADMINISTRATOR": Selecting "No" here removes the "Administrator" checkbox as an email option.
SHOW "EMAIL OTHERS": And, similar to the above options, a "No" here removes the option to enter one or more additional email addresses for sending the client report form.
SHOW "ATTACH A FILE": Choosing "No" removes the options to attach a file and notify the client. (This does not impact file attachments on the appointment form.)
Email Options
The four selections below "Display Options" allow you to set one or more emails to be sent automatically. Setting any option to "Checked" or adding an email address would mean that an administrator would not have to select the option to email the client report form, but they could uncheck a box or remove the email address to not send the email.
DEFAULT "EMAIL TO CLIENT": Choosing "Checked" adds a checkmark to the "Client/Student" checkbox by default. The individual filling out the client report form can uncheck the box to choose not to send the email to the client.
DEFAULT "EMAIL TO RESOURCE": Selecting "Checked" adds a checkmark to the "Staff/Resource" checkbox by default. The individual filling out the client report form can uncheck the box to choose not to send the email to the staff or resource.
DEFAULT "EMAIL TO ADMINISTRATOR": Similar to the above, "Checked" adds a checkmark to the "Administrator" checkbox by default. The individual filling out the client report form can uncheck the box to choose not to send the email to the center's email address.
DEFAULT "EMAIL OTHERS" EMAIL ADDRESS: Add one valid email address to have that email address entered in the "Email Other Address" field on the client report form by default. The individual filling out the client report form does not have to fill in an email address to have the client report form emailed to that individual, but they can still remove or change the email address on the client report form.
Reporting Options
ALERT ADMINISTRATORS OF THEIR ORPHAN APPOINTMENTS: With the term depending on any change that you make to the "Orphan" label in Language Options, "Orphan appointments" are appointments that do not have client report forms. You and your staff can check the Master Listings Report to find all or any one staff or resource's orphan appointments. If you would like staff to be presented with a display of their own appointments that do not yet have client report forms, as long as staff email addresses are listed in Staff & Resource Management, a "Yes" here adds each staff member's clickable list of orphan appointments to their own schedule view (on the standard or calendar display). As in the Master Listings Report, these exclude placeholders and no-shows.
Sections in this Chapter
SECTION 1: Form Setup: Appointment Form
SECTION 2: Form Setup: Client Report Form
SECTION 3: Form Setup: Registration Form