![]() In Module Setup: Time Clock (which you'll find under the "System Configuration" section of the Welcome menu, you'll find a variety of options for setting up your time clock. Some centers have a strong preference or obvious need for the time clock, such as those that want to record exact times, down to the second, that students and staff arrived and left. However, the Time Clock can also be used in several other ways:
In Module Setup: Time Clock (which you'll find under the "System Configuration" section of the Welcome menu, you'll find a variety of options for setting up your time clock. Some centers have a strong preference or obvious need for the time clock, such as those that want to record exact times, down to the second, that students and staff arrived and left. However, the Time Clock can also be used in several other ways:
- If your center has a policy that staff members have to clock in and out, or if you would like them to clock in and out when they work on specific projects under different grants, you could enable the time clock for administrators and include a q
 uestion and drop-down menu for staff members to select each type of project, work, research, etc.
 - Students might arrive early or stay after appointments to use a study area, computers, or other equipment. If you would like to see, and be able to report on, how much total time students spend at the center, you would make the time clock available to everyone, and, if you find it helpful, add a question to find out what students are working on.
- At some centers, students reserve slots in long workshops, review sessions, or other group tutoring times, but they can arrive at any point and leave once they are ready. You can have students clock in and out to find out how much time they spent in the group appointment.
- If you and your staff would like to see which appointments are underway or if clients have arrived early, you can use the time clock (with APPOINTMENT MATCH set to "Yes," to have each appointment turn green as soon as the client clocks in.
- If your center uses a waiting room or queuing system so that students arrive to wait for tutors to become available, you would use the time clock in waiting room mode.
The time clock can also be optionally paired with a card reader (to allow clock-ins and outs via the swiping of an institutional ID card) or can be used as a waiting room to show administrators those waiting for an appointment. Like nearly all modules and features in WCONLINE, the use of the Time Clock is completely optional. Hover over the question mark icons within the control panel for more information about each configuration option.
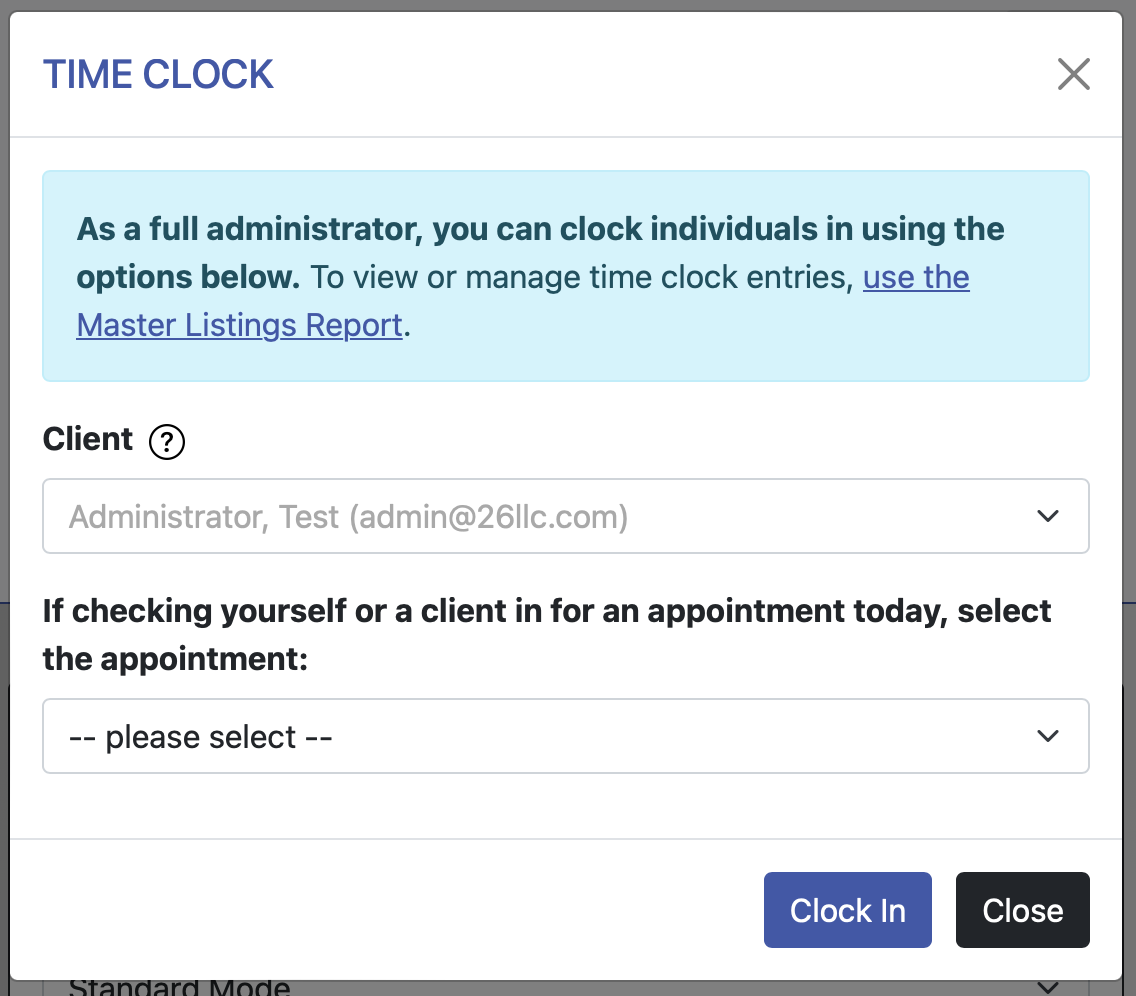
Once you've configured the time clock, administrators and (optionally) clients will access the tool by selecting the checkmark icon that appears within the navigation menu once logged in. The icon text will appear in green if the person logged in hasn't clocked in or in red if they have. If paired with a card reader, staff and clients can also access the time clock by swiping their ID cards on the WCONLINE login page.
Configuration Options
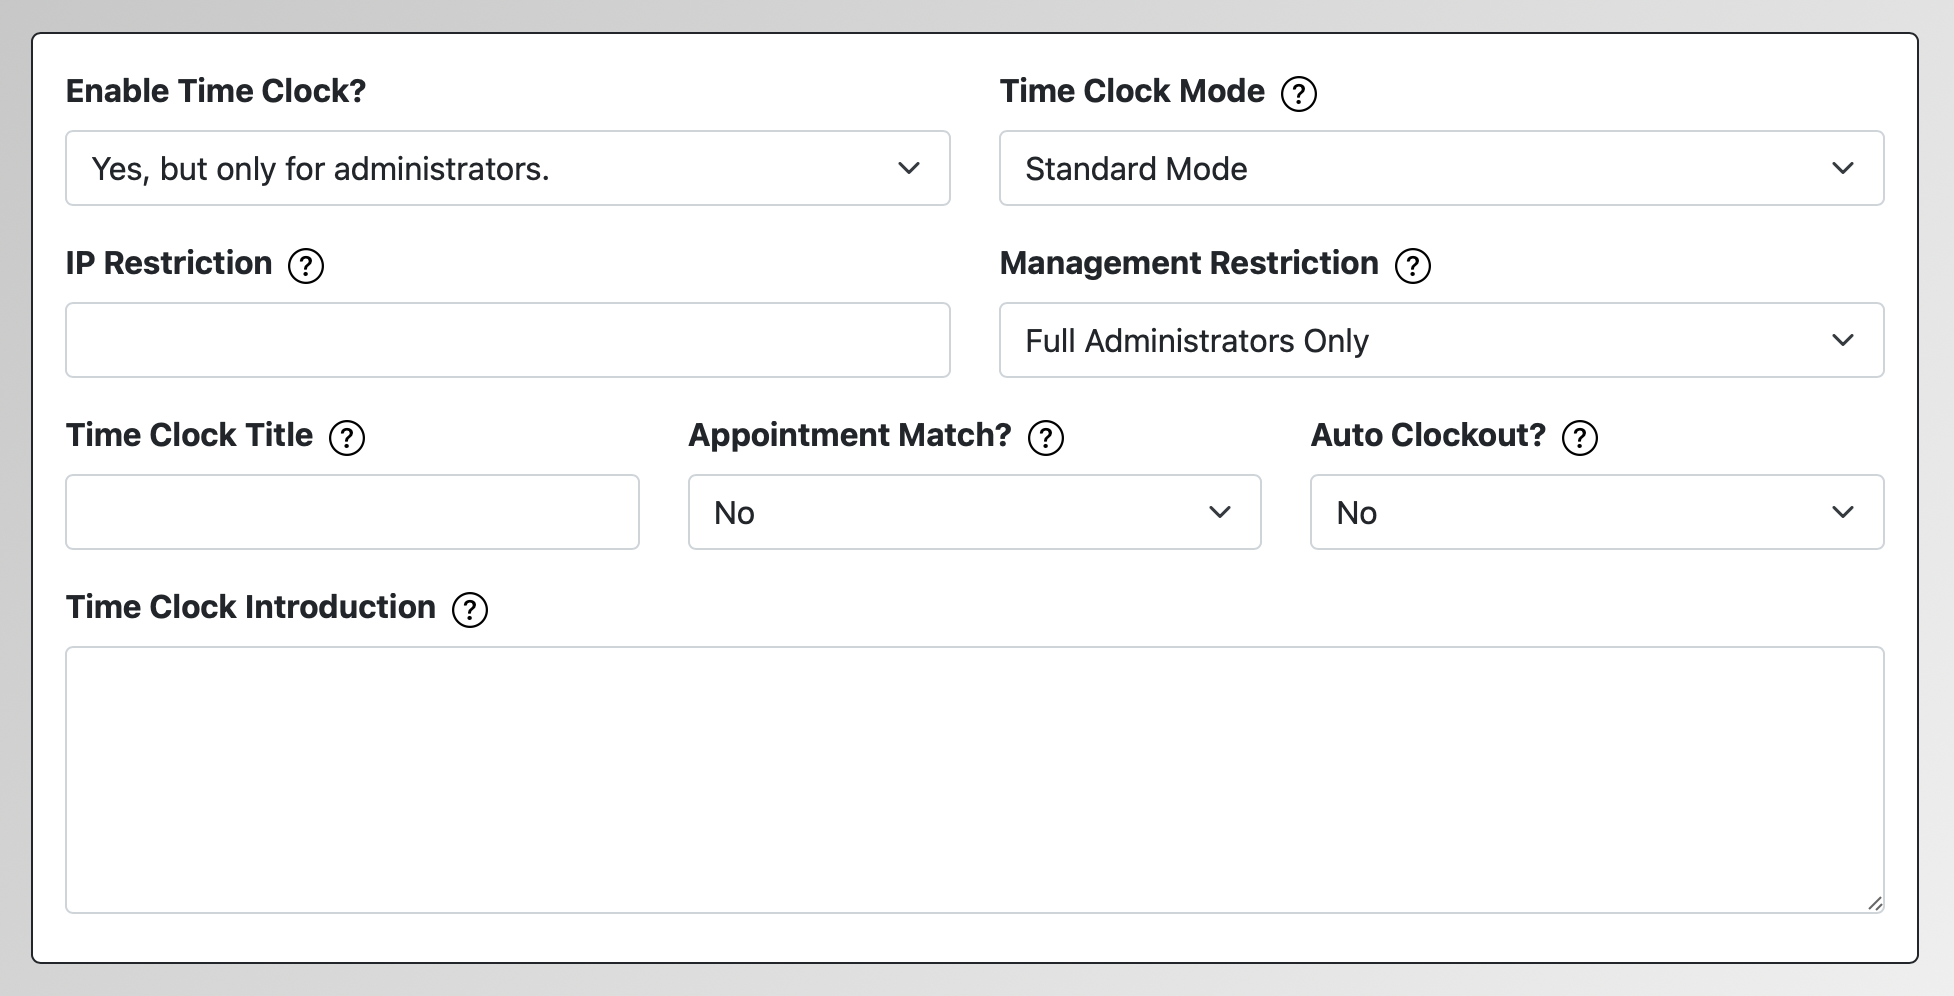
ENABLE TIME CLOCK: If you want to use the time clock, you'll need to set this option to one of the 'yes' options. If you only want administrators to access the time clock (such as if you're going to use the time clock to keep track of staff hours), then you will set the option to YES, BUT ONLY FOR ADMINISTRATORS. If you intend to use the time clock to record client clock-ins and outs (such as if you want to keep track of when a client arrives for their appointment), then you'll want to set the option to YES, AND ALLOW EVERYONE TO ACCESS IT. Full administrators can always access time clock data in the Master Listings Report, clock individuals out, and, as long as the time clock is enabled, clock individuals in.
TIME CLOCK MODE: For most uses, you'll leave the time clock in STANDARD MODE This means that the time clock will be accessed via the checkmark icon at the top of your schedule.
 WAITING ROOM MODE is designed for centers that need to know when a client arrives at the center. For example, walk-in-only centers might find it beneficial to see a list of clients who are in a reception area waiting for an available opening. Even online-only centers might benefit from this mode if they want to see a list of clients who are available and interested in meeting immediately with an available staff. With this mode enabled, clients will continue to clock in (or check themselves in) by selecting the clock in icon. Clients that have clocked in will appear in a list at the top of the schedule (and shown to administrators only) in order of when they clocked in. As a staff member is able to work with a client, they'll take the client off of the waiting room list by selecting the checkmark icon next to the client's name. Administrators can also view the profile of a client who is in the waiting room by clicking on the client's name. Note that if a center uses WAITING ROOM MODE for queuing (while waiting for a tutor to become available) and takes clients out of the waiting room as they start meeting, then the center uses their time clock data to find out how long students were waiting before appointments. If a center uses WAITING ROOM MODE as an easy way to see who is currently clocked-in and then to clock them out when they finish and/or leave, then the center uses their time clock data to find out how long students were at the center.
IP RESTRICTION: By default, the time clock is available from any computer or internet connected device, regardless of the device's location. If you want to ensure that the time clock is only accessed from a specific location--such as only allowing individuals to clock in when they physically arrive at a center computer--you'll enter the computer's public IP address in this field. If you need to allow multiple computers to use the time clock, you will need to enter the IP address of each computer here with each IP separated by a comma (such as "123.456.789,123.456.790"). IPs must be public and static. Many centers will need to contact their IT departments to obtain such an address.
MANAGEMENT RESTRICTION: By default, only full administrators can manage, edit, and remove time clock entries. They do this by setting the "Content Limit" of the Master Listings Report (available in the Welcome menu or via icon at the top of the schedule display) to "Time Clock Data" (or by selecting on the clock in or out option at the top of the screen and following the on-screen instructions). The Master Listings Report allows administrators to view time clock data by client or date range, edit the time clock entries, see the IP address from which an individual accessed the time clock, clock clients in (even while the administrator remains clocked in), and clock clients out.
Keeping the management of the time clock set to full administrators only allows the time clock to be used to record staff working hours without the risk of staff being able to modify their own (or each other's) clock-in and clock-out times or be able to clock other individuals in. If you aren't using the time clock for recording staff time, you can set this option to FULL & BASIC ADMINISTRATORS to enable basic administrators to manage the time clock and work with time clock data in the Master Listings Report. Regardless of this setting, basic and full administrators will be able to see the waiting room display (but only full administrators can take people off the waiting room).
TIME CLOCK TITLE and TIME CLOCK INTRODUCTION allow you to define the title of your time clock and the text information and instructions displayed below the title on the time clock itself. Clients and administrators see this information when accessing the time clock to clock in and out.
APPOINTMENT MATCH: By default, clients and staff can clock in and out for any reason--such as for arriving at the center itself, beginning to use a computer, or ending a work shift. If this option is set to YES, then clients will be asked to choose from their current day's appointment(s) (and administrators will be able to choose from all of the current day's appointments) when using the time clock to clock in. This allows the system to match time clock data with appointment data, if the time clock is used for recording the time that a client arrives and leaves for a specific, scheduled appointment.
AUTO CLOCKOUT: If an individual forgets to clock out (or if you only ask individuals to clock in and not out), that individual will remain clocked in until they clock out. This can lead to someone being clocked in for several days, and would then require an administrator to update the clock out time to be accurate. If this option is set to anything other than NO, this option tells the system clock out everyone who is still clocked in at a specific time, and automatically sets the clock out time to a specific number of minutes after the clock in time. The time at which this function runs is determined by the REMINDERS/SCRIPTS STARTING TIME setting in Global System Settings.
Time Clock Questions
You can optionally include up to two questions on the time clock. These questions are answered by individuals when they use the time clock to clock in. These questions are typically used to record why someone is clocking in, staff hours devoted to specific projects, or what resources (such as books or computers) someone is going to use during their visit. The questions are also configured in the same way as other forms within WCONLINE.
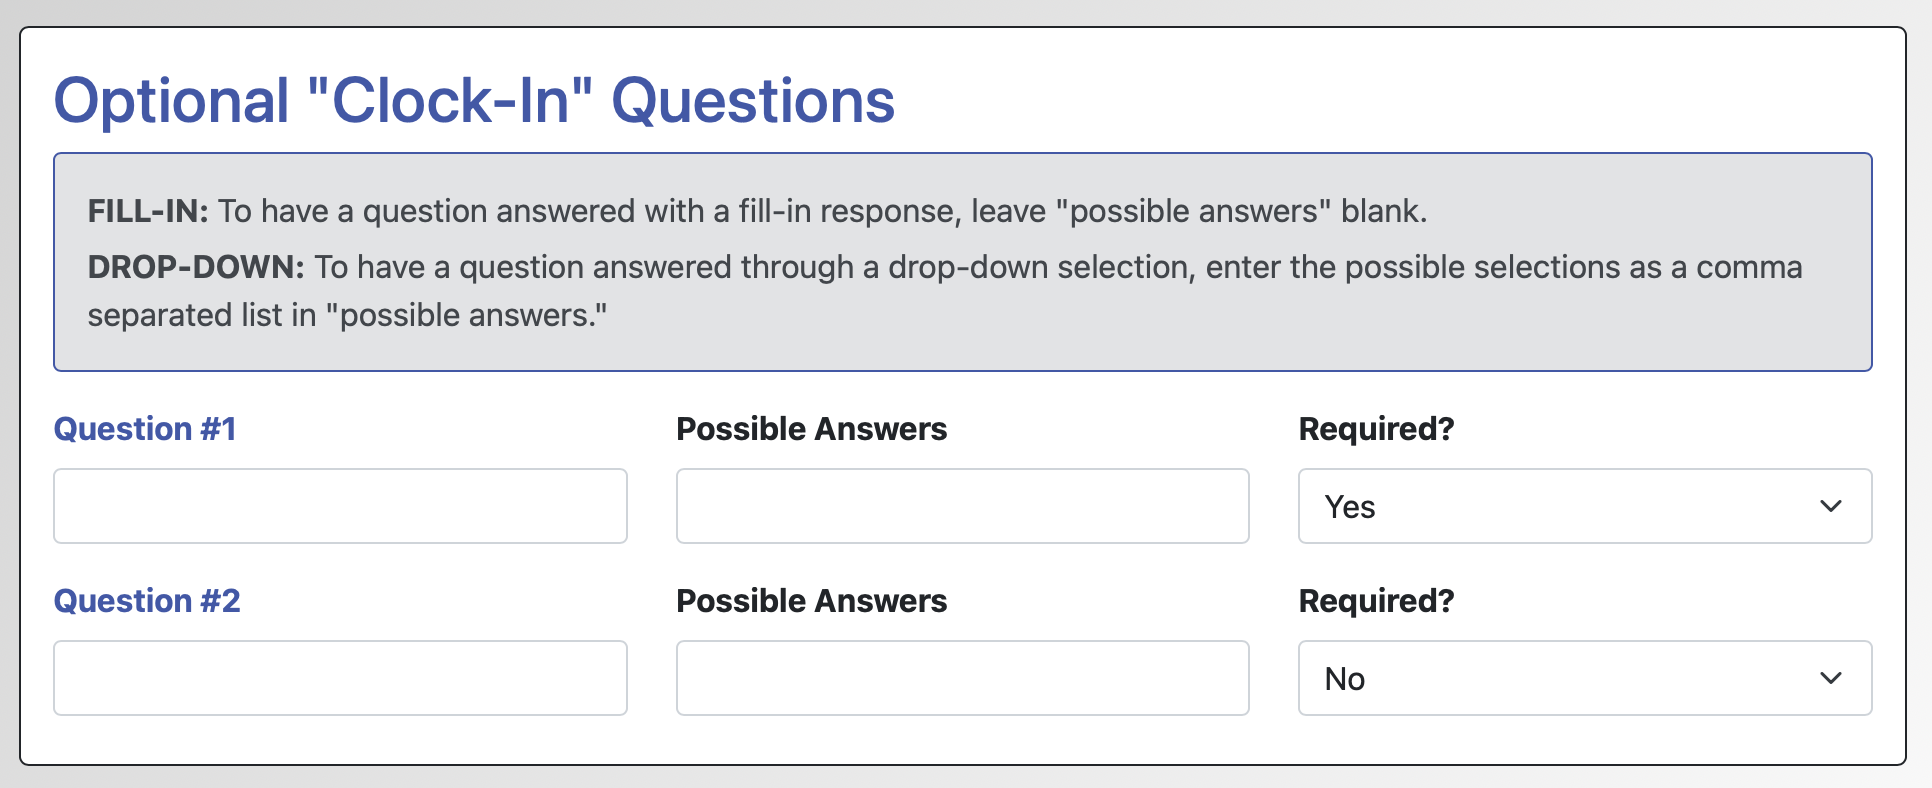
QUESTION: This field lets you define the question as asked on the time clock.
POSSIBLE ANSWERS: This field lets you define the type of answers or the available answer choices available to answer the corresponding question on the time clock. Be sure to review the "Possible Answer Types" informational box above the question configuration options for extensive information about the various answer types. The time clock offers fill-in and drop-down question and answer types.
REQUIRED? This field lets you set whether or not a client has to complete the corresponding question in order to clock in.
Time Clock Data
If you select the time clock checkmark within the navigation menu, in addition to the option to clock yourself in or out, you can click a link to go to the Master Listings Report, already limited to time clock data on the current day--a quick view of individuals who are clocked in or who have clocked in and out. Without changing any report parameters, you a clock clients in and out, and edit time clock entries.
If you would like to work with time clock data in the Master Listings Report from elsewhere in WCONLINE, you can limit the report to time clock data, select any other parameters, including any date range, to view clocked-in times, clocked-out times, and elapsed times.
Finally, you can export your time clock data into a spreadsheet using the "Time Clock Data" option in the System Data Export tool. You'll also find this tool under "System Utilities & Reports" in your Welcome menu.
Sections in this Chapter
SECTION 1: Time Clock Setup and Use