In Staff and Resource Management (which you'll find under the "Schedule & Staff Management" in the Welcome menu), selecting ADD NEW STAFF OR RESOURCE from the "Area Tools" menu will take you to the "Add a New Staff or Resource" form where you can add a new staff or resource on to a currently-available schedule. Similarly, selecting EDIT STAFF OR RESOURCE from the "Options" menu to the right of a resource's name in the overview will take you to the "Edit" form where you can edit the settings associated with an existing staff or resource. Both forms are identical with the exception that the "edit" form shows the existing settings for the staff or resource.
The resulting form is broken up into three sections--Introductory Settings, Staff & Resource Options, and Email-Specific Options. As with all control panels, be sure to hover over the question mark icons within the control panel in order to find suggestions and more information about each configuration option.
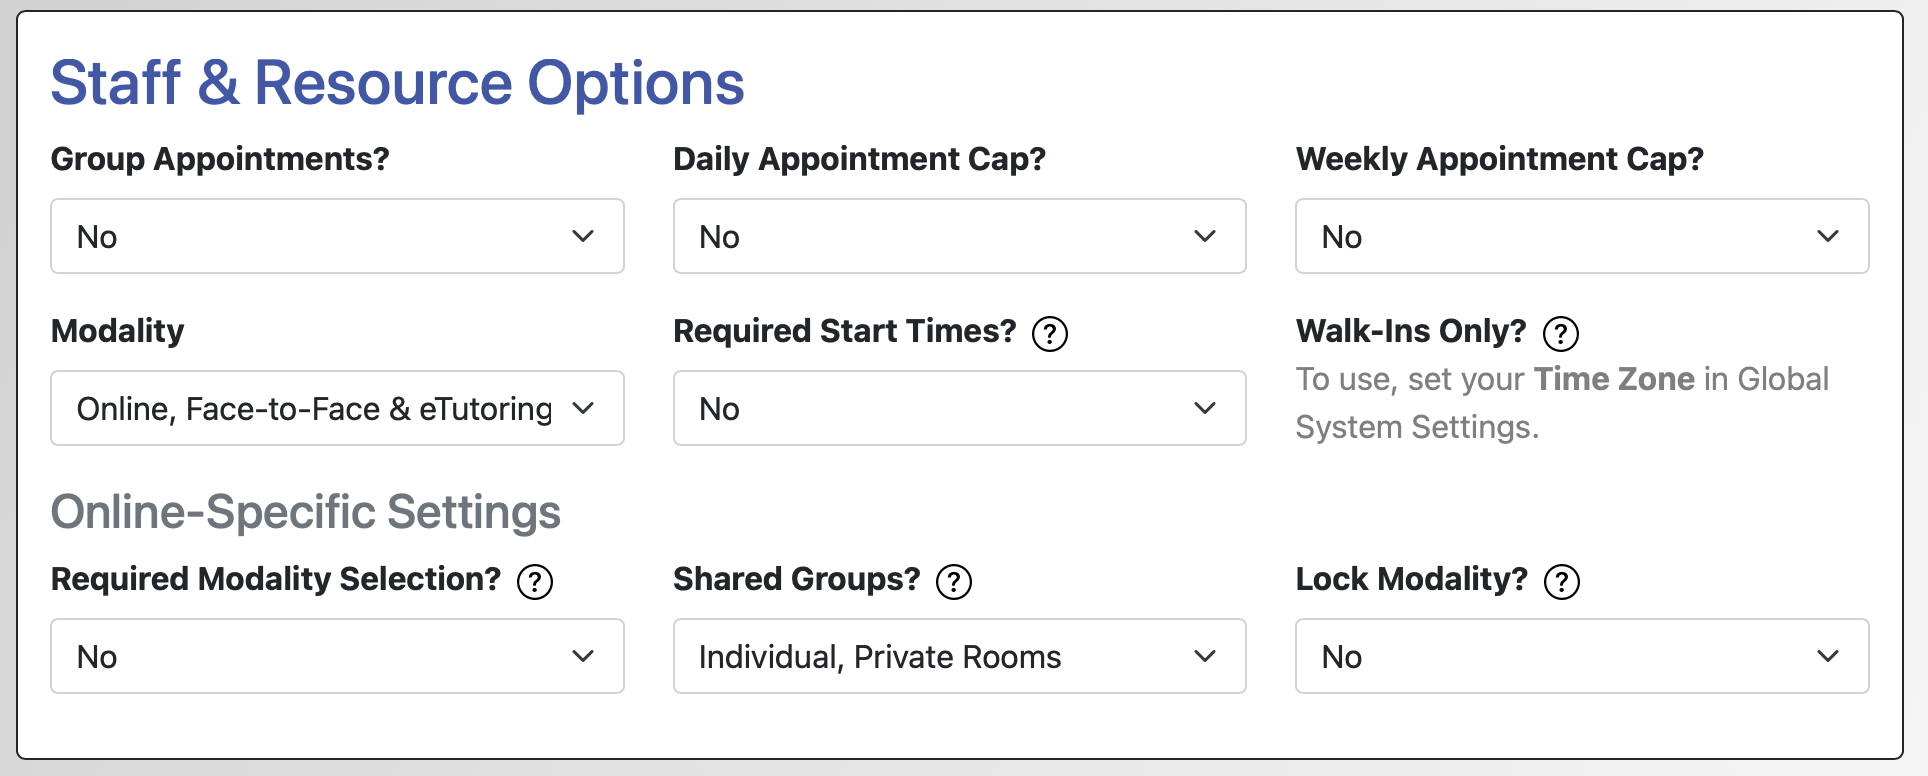
Staff & Resource Options
These are the settings that appear in the second section when editing or adding a staff or resource. They control things like the appointment modality, group and walk-in appointment availability, and limits on the number of appointments allowed with each specific resource.
GROUP APPOINTMENTS? By default, and if this option is set to NO, WCONLINE allows a single client to make a single appointment per time slot on the schedule (or to make a one-on-one appointment where a single client meets with a single staff person in each time slot). If you want this resource to allow multiple clients to make an appointment with this resource at the same time, then set this number to the maximum number of appointments that should be allowed per time slot. This is most useful for scheduling things like workshops, small group tutoring, or shared workspaces.
DAILY APPOINTMENT CAP? This setting defines the total number of appointments that this staff or resource can have on any given day. For example, if a staff member is available from 8am to 5pm daily, but can only have three, one-hour appointments per day within that time frame, you would set this option to YES. ALLOW ONLY 3 APPOINTMENTS/DAY. After three appointments were scheduled with this resource on a given day, all remaining time for that resource on that day would be grayed out preventing additional appointments from being scheduled by non-administrators. Regardless of this setting, administrators can continue to make appointments for and in the name of clients up until all slots on the schedule are filled. If you are trying to restrict the number of appointments that any single client can make per day, that is set within the "Client Scheduling Limits" section of Schedule Management.
WEEKLY APPOINTMENT CAP? This setting defines the total number of appointments that this staff or resource can have during a given week (which WCONLINE defines as spanning from Monday to Sunday). For example, if a staff member is available from 8am to 5pm daily, but can only have three, one-hour appointments in any given week, you would set this option to YES. ALLOW ONLY 3 APPOINTMENTS/WEEK. After three appointments were scheduled with this resource on any days within a given week, all remaining time for that resource would be grayed out preventing additional appointments from being scheduled. Regardless of this setting, administrators can continue to make appointments for and in the name of clients up until all slots on the schedule are filled. If you are trying to restrict the number of appointments that any single student can make per week, that is set within the "Client Scheduling Limits" section of Schedule Management.
MODALITY: This option allows you to define the types of appointments for which the staff or resource is available. WCONLINE allows for three types of appointments to be scheduled. Note that the name of each option (face-to-face, online, and eTutoring by default) may be set using LANGUAGE OPTIONS available via the "Area Tools" menu in Global System Settings.
- Face-to-Face Appointments are typically appointments where a student meets with a staff member at a specific, real location for an in-person meeting.
- Online Appointments are synchronous appointments where a student and staff member meet online using the WCONLINE Online Consultation Module (or Zoom if integrated with WCONLINE). Once enabled, the session participants will click on the appointment on the schedule and then on "Start or Join Online Consultation" to meet online.
- eTutoring Appointments are asynchronous appointments where a student uploads a paper for a staff member to respond to offline before uploading a response. If this option is enabled, file attachments are automatically enabled for the selected schedule so that students and tutors can attach files to appointments.
As long as you select an option that includes either "eTutoring" or "Online" appointments, clients will be presented with a question that asks them to select the type of appointment that they want when making an appointment with the given staff or resource. That question and other options related to that question can be defined using LANGUAGE OPTIONS available via the "Area Tools" menu in Global System Settings.
REQUIRE START TIMES? Via Schedule Management's REQUIRE SPECIFIC STARTING TIMES setting, you can set your schedule to require specific starting times for appointments (such as requiring that all appointments start on the whole hour). If you would like for this resource to have different required starting times, then you can set that here. The setting here will trump the more global setting in Schedule Management.
This is most useful for schedules with thirty minute increments with some staff starting at :00 and others at :30. By setting this option, you could require specific starting times for each staff member to ensure that, for example, only one hour appointments are made without leaving thirty minutes in between.
WALK-INS ONLY? If this resource is only used for walk-in appointments (online or in-person), then consider setting this option to YES. WCONLINE will then open up each available time slot fifteen minutes before the slot's starting time and will leave it open until it's filled or until the ending time of the slot passes. This lets clients make last minute appointments on the schedule as a time slot becomes available, but prevents clients from reserving those slots too early. Note that this setting requires that you set your INSTITUTION'S TIME ZONE in Global System Settings. Appointments made with walk-in only resources are automatically designated as a walk-in appointment via the checkbox at the bottom of the appointment form.
ONLINE-SPECIFIC SETTINGS
REQUIRE MODALITY SELECTION: If a resource is available for online or eTutoring sessions (as set above), WCONLINE displays a "meet online?" question on the appointment form. The first or default availability type (as defined in LANGUAGE OPTIONS in Global System Settings) is preselected, allowing a client to quickly make their appointment.
If you would prefer that clients be forced to select the type of appointment that they want, set this option to YES. Clients and administrators will then be required to select from the list of available appointment types before being able to save the appointment.
SHARED GROUPS? If you offer online group appointments (by setting MODALITY to an option that includes "online" and by setting GROUP APPOINTMENTS to YES), then WCONLINE will allow multiple clients to sign up for an online appointment in the same time slot on your schedule.
This setting determines if those students should meet with the resource together in the same SHARED GROUP ROOMS (where they can see each other's work and where they work on the same physical document), or if they should meet in INDIVIDUAL, PRIVATE ROOMS (where the resource uses multiple browser windows to meet with each student in their own, private space). If you select SHARED GROUP ROOMS, note that the GROUP APPOINTMENTS setting cannot be more than 10.
LOCK MODALITY? If the staff or resource offers both group appointments (by setting GROUP APPOINTMENTS to YES) and any combination of types of online and face-to-face meetings, and if you would like to require that students joining a group make the same type of appointment, choose YES.
For example, if a tutor offers online and face-to-face meetings in group appointments, a YES would mean that, if the first student made an appointment to meet online, all other students joining the same group would also be making online appointments. (As always, at other times with no existing group members, students would continue to be able to choose their appointment type.)
Sections in this Chapter
SECTION 1: Staff and Resource Overview
SECTION 2: Add or Edit: Introductory Settings
SECTION 3: Add or Edit: Staff & Resource Options
SECTION 4: Add or Edit: Email-Specific Options
SECTION 5: Duplicate Staff or Resources
SECTION 6: Administrative Access Management
SECTION 7: FAQ (Administrative Access, Notifications, and More)