 Once you open Staff and Resource Management (which you'll find under the "Schedule & Staff Management" section of the Welcome menu), you'll see an overview of all current staff and resources. Current staff and resources are those that are attached to schedules that have an AVAILABILITY of either "Available to Everyone" or "Available to Administrators Only" in Schedule Management. If you want to work with staff and resources that are attached to a schedule that has been hidden or archived, you'll first need to edit that schedule in Schedule Management to change its AVAILABILITY to something other than "Hidden / Archived."
Within WCONLINE, the people and things that clients make appointments with are called "staff and resources" (as WCONLINE can be used to schedule everything from staff, to lab stations, to center resources). Typically, a center administrator will work through the options in this control panel when adding new staff to the system or when initially creating a new schedule for a new scheduling period.
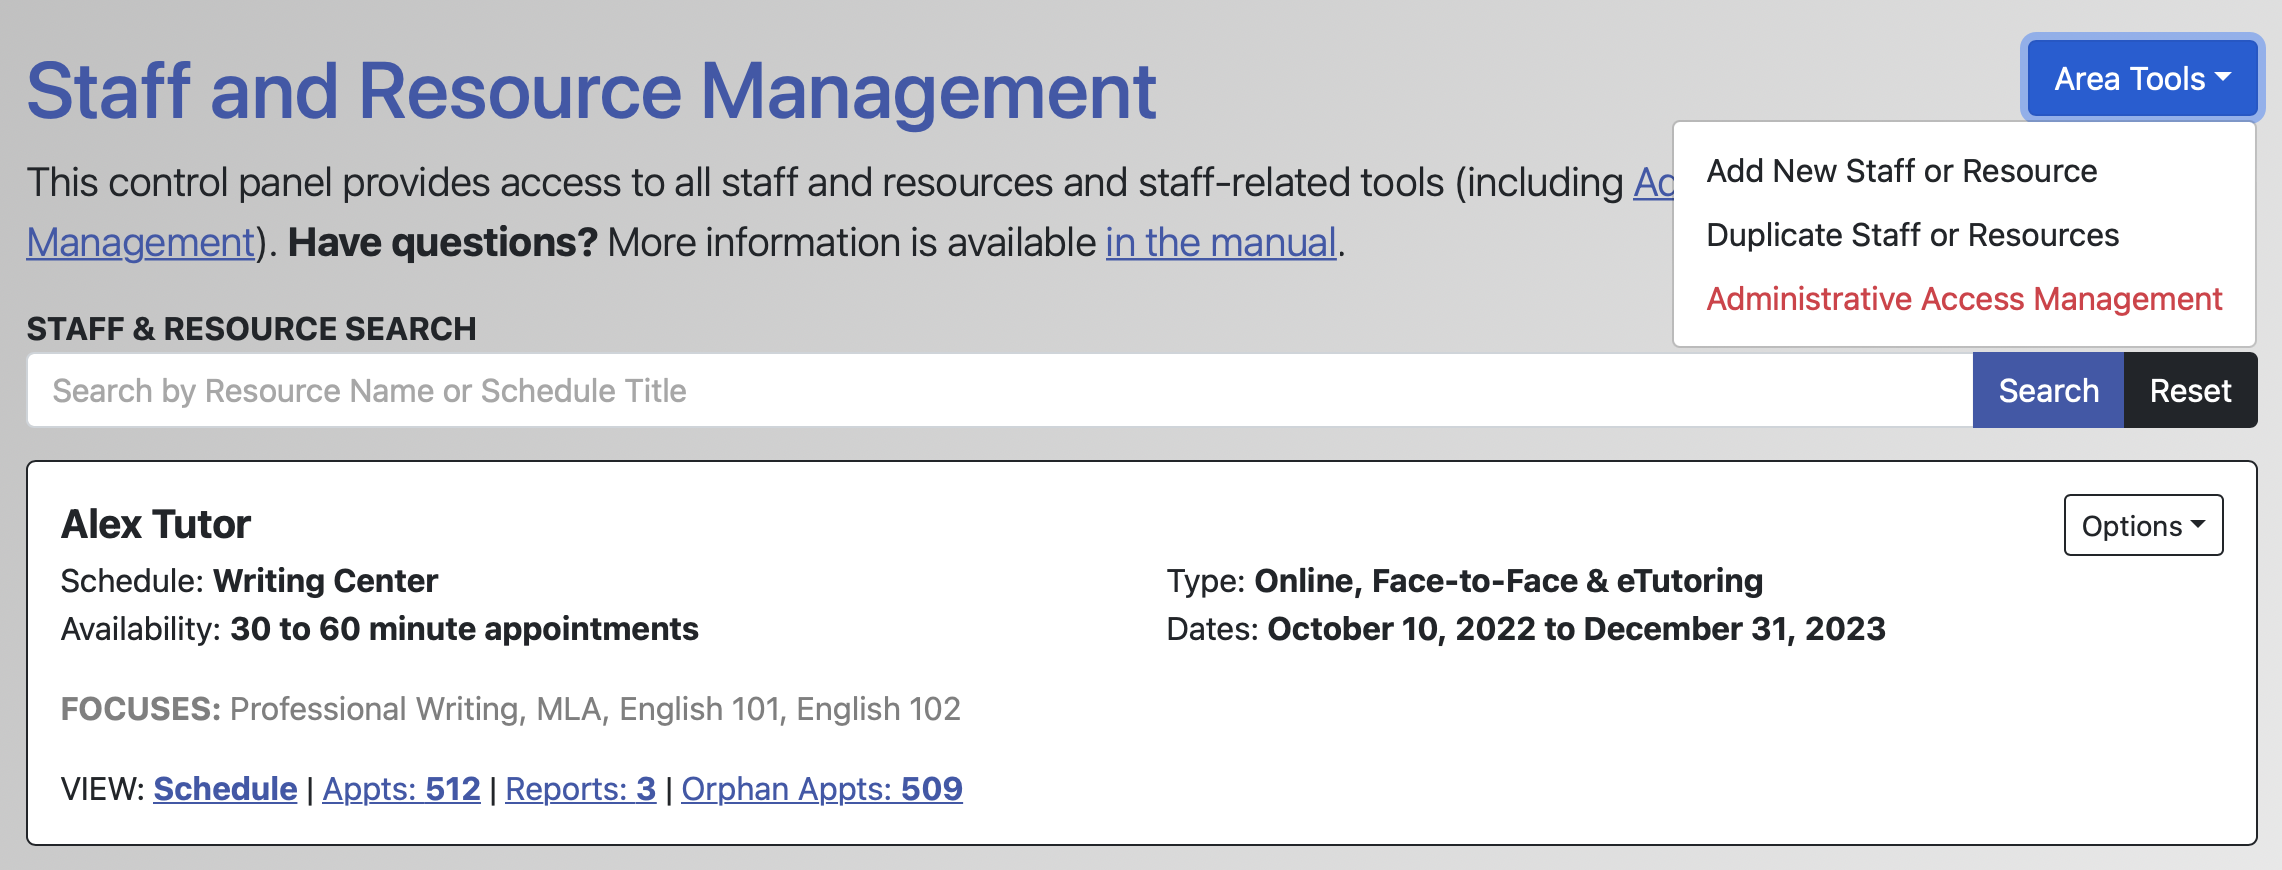
The "Area Tools" menu available at the top of the overview allow access to other areas of Staff and Resource Management:
- ADD NEW STAFF OR RESOURCE: This tool lets you create a new staff or resource and attach that to one of your existing schedules.
- DUPLICATE STAFF OR RESOURCES: This tool lets you duplicate returning staff and resources from an older schedule to a new schedule.
- ADMINISTRATIVE ACCESS MANAGEMENT: This tool lets you manage basic and full administrative access to your WCONLINE system.
Also near the top of the overview is a STAFF & RESOURCE SEARCH. If you enter a staff or resource's name (as set via the STAFF OR RESOURCE NAME field in Staff or Resource Management) or the title of one of your schedules (as set via the SCHEDULE TITLE field in Schedule Management) and select the "search" button, WCONLINE will show just the staff with the specified name or that appear on the specified schedule. You can enter just a partial name, such as "John" to see all staff or resources with a name that includes "John" (such as "John Tutor," "John Doe," and "John Smith"). Selecting the "reset" button will return to the standard, default overview display.
![]()
The rest of the overview is made up of individual listings for each current staff and resource. That display shows the staff or resource's name in a larger, bold font followed by resource-specific information:
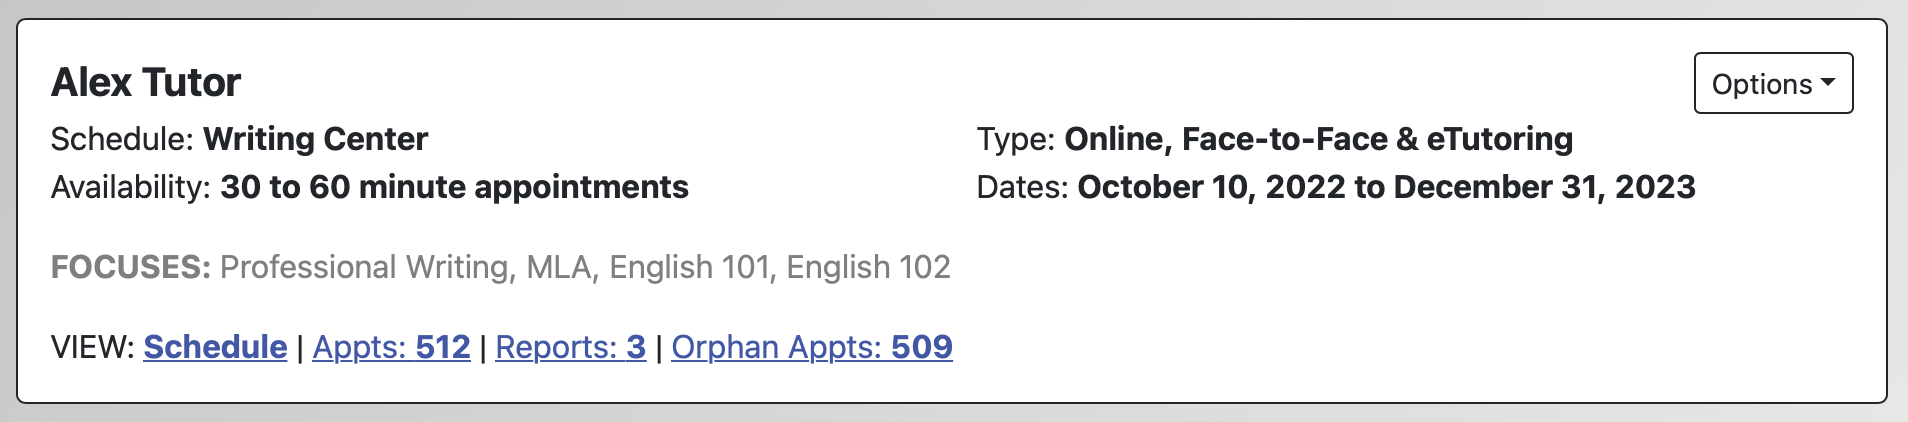
SCHEDULE: This is the schedule on which the staff or resource appears.
AVAILABILITY: This shows the length of appointments that can be scheduled with the staff or resource. To change this, select "Edit Staff or Resource" from the listing's "Options" menu to edit the entry and then adjust the MINIMUM APPOINTMENT LENGTH and the MAXIMUM APPOINTMENT LENGTH settings. Since the slots on slot-based schedules (as set via the SLOT SCHEDULING ONLY? setting in Schedule Management aren't time-based, this display isn't included for resources on slot-based schedules.
FOCUSES: If you allow clients to narrow the schedule display by selecting a focus (by enabling the SELECT BY FOCUS? option in Schedule Management), then this will show the focuses that are currently listed for the staff or resource. To change the resource's focuses, select "Edit Staff or Resource" from the listing's "Options" menu to edit the entry and adjust the FOCUSES setting. If a staff or resource doesn't have any focuses, or if the schedule isn't using the focus option, then this information will not be displayed.
VIEW: This shows the number of appointments, client report forms (including off-schedule client report forms), and orphan appointments (or appointments for which a client report form hasn't been entered) for the staff or resource. If you have relabeled "Orphan" in the "Language Options" section of Global System Settings, then the link will use your chosen term. Selecting one of the labels (such as "Appts: 512" within the above image) will take you to the Master Listings Report with the selected item displayed. If a staff or resource doesn't have any appointments, client report forms, or orphan appointments, then the associated VIEW option will not be displayed. Selecting the "Schedule" link will take you to the Calendar Display or the Standard Display depending on your preferences.
TYPE: This shows the modalities for which the staff or resources is available (with the options being face-to-face, asynchronous eTutoring, and/or synchronous online tutoring). To change this, select "Edit Staff or Resource" from the "Options" menu to edit the entry and then adjust the MODALITY setting.
DATES: By default, this shows the schedule's STARTING and ENDING DATES as set in Schedule Management. If the staff or resource has different DATES as set in Staff and Resource Management, then those are displayed instead. If neither the schedule or the resource's entry have starting and/or ending dates, then the DATES listing won't be displayed.
EDIT STAFF OR RESOURCE: Selecting this link from the "Options" menu will take you to the "Edit" page where you can make changes to the resource's existing settings.
DELETE STAFF OR RESOURCE: Selecting this link from the "Options" menu will cause the system to ask you to confirm that you wish to delete the specified staff or resource. Be sure to read the confirmation screen carefully. If you confirm, then the resource and all appointment data attached to the resource will be permanently deleted. Only full administrators can delete staff and resource listings.
At the bottom of the staff and resource overview, you'll also find two options that define how the overview itself is displayed:
PER PAGE: By default, the system shows five resources per page. If you would like to see ten or twenty-five resources per page, select the applicable number and the display will automatically update.
PAGE: If you have more resources than what can be displayed on a single page, selecting a number after this option will show you additional resources.
Sections in this Chapter
SECTION 1: Staff and Resource Overview
SECTION 2: Add or Edit: Introductory Settings
SECTION 3: Add or Edit: Staff & Resource Options
SECTION 4: Add or Edit: Email-Specific Options
SECTION 5: Duplicate Staff or Resources
SECTION 6: Administrative Access Management
SECTION 7: FAQ (Administrative Access, Notifications, and More)