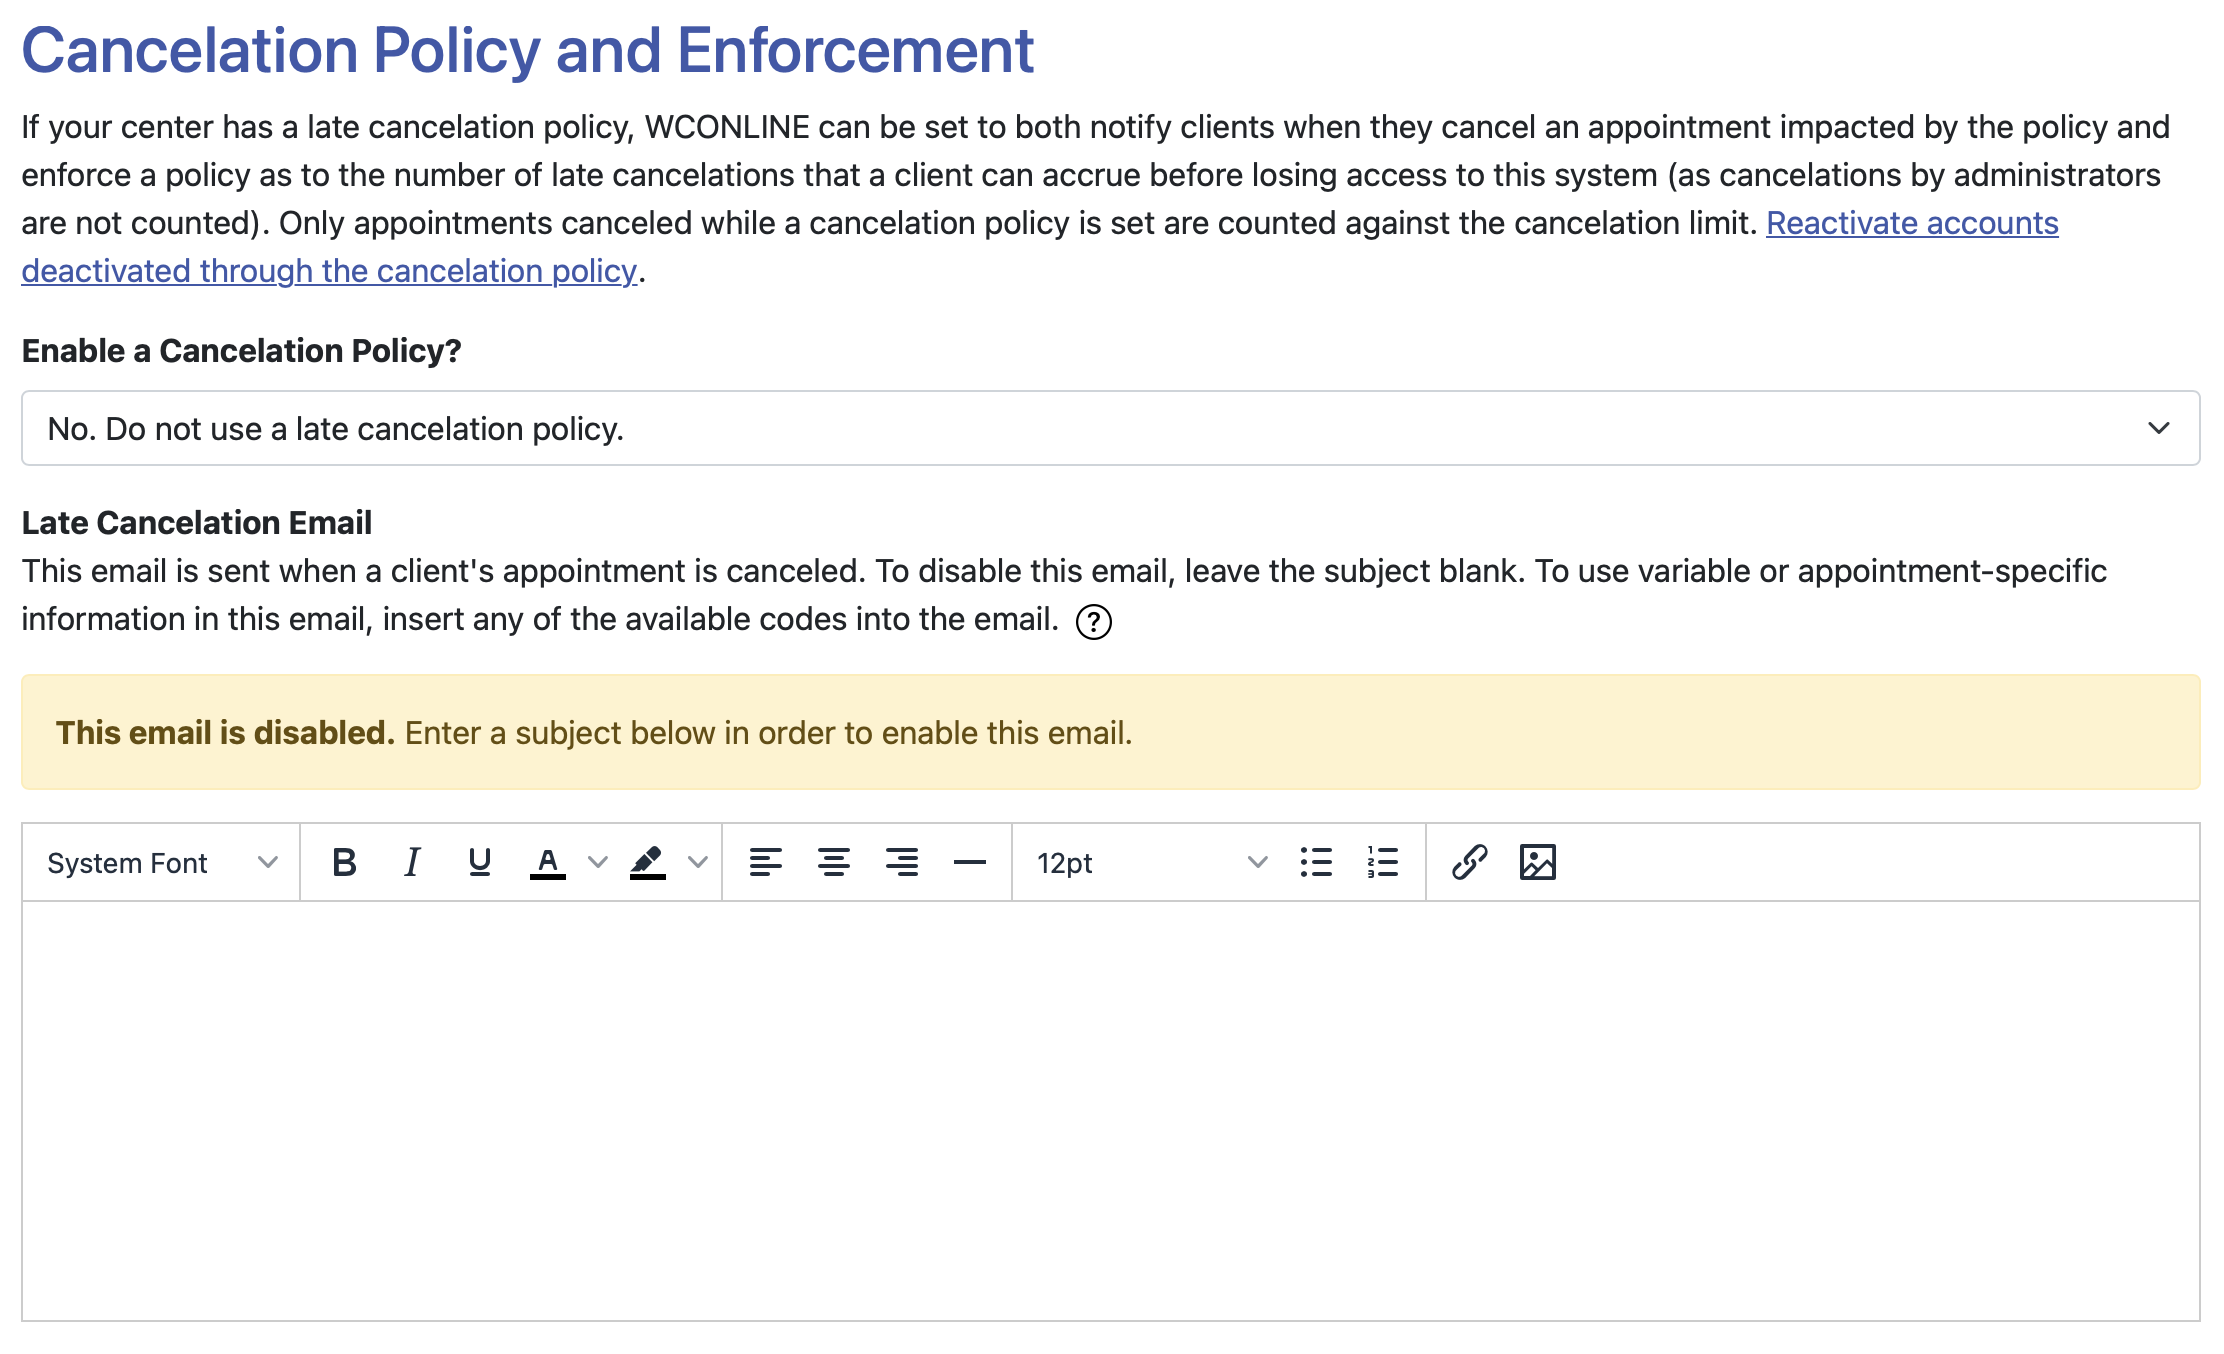
In Global System Settings (which you'll find under the "System Configuration" section of the Welcome menu), you can define a variety of system-wide settings and controls. The ninth section in Global System Settings, titled "Cancelation Policy and Enforcement" and available by clicking "CANCELATIONS" in the "JUMP TO" links, lets you implement a late cancelation policy at your center. This policy can optionally remove a client's access if they cancel too close to the appointment's starting time. As with all control panels, be sure to hover over the question mark icons for more information about each configuration option.
As long as your time zone is set under INSTITUTION'S TIME ZONE, also in Global System Settings, you will see options under CANCELATION POLICY AND ENFORCEMENT.
Clients may choose to cancel their own appointments, if allowed by your optional RESTRICT APPT. CHANGES setting in Schedule Management. And, administrators can cancel clients' appointments anytime, even when your policies would not allow, with no repercussions for clients. You can always find canceled appointments, including who canceled them and when, by using the Master Listings Report.
The options in this control panel allow you to decide whether to handle late or last-minute cancelations through an automatically-applied policy.
Cancelation Policy and Enforcement
ENABLE A CANCELATION POLICY: This option lets you specify what counts as a late cancelation. For example, if you set this option to YES. COUNT CANCELATIONS WITHIN 60 MINUTES OF THE APPOINTMENT TIME AS LATE, then a client who cancels less than sixty minutes before the start of their appointment will have that cancelation be considered "late." (The same is true of appointments canceled for clients by administrators.)
LATE CANCELATION EMAIL: The cancelation policy email is sent to the client when the client cancels an appointment too close to the appointment time. This field is where you'll compose the body of the email message. Most centers include a salutation and briefly state that the appointment was counted as a late cancelation based on a specified center policy.
Like most emails within WCONLINE, the system provides several "Available Codes" that you can use within the subject and body of the email. Those codes, visible by hovering over the question mark icon, are replaced with non-static information. For example, if you enter [date], that code is replaced with the date of the appointment.
CANCELATION EMAIL SUBJECT: This is where you'll enter the subject line for the outgoing email. Leave the subject blank to deactivate the email.
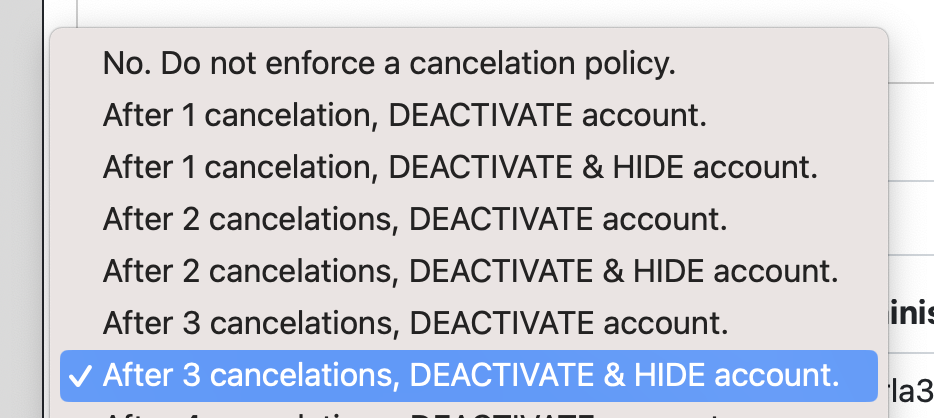 ENFORCE A CANCELATION POLICY: This setting defines your center's late cancelation policy and the repercussions for canceling late too many times. If you would like to automatically deactivate a client's account after a specific number of late cancelations, select that number here.
- If an account is deactivated, then that individual will not be able to log in to the WCONLINE system until the account is reactivated by an administrator. This would allow the client to continue as a walk-in, where an administrator makes the walk-in appointment for the student.
- If an account is deactivated and hidden, then that individual will not be able to log in and administrators will be unable to make appointments for that individual until the account is reactivated by an administrator.
These options, therefore, require that a client who has had too many late cancelations contact an administrator in order to continue scheduling at your center. Once an administrator decides to reactivate a client's account, they can do so by searching for the account in Client and Record Management and then selecting "Account Options" from the "Options" menu. If the client then accrues another late cancelation, the account will again be deactivated as the number of late cancelations would again exceed your limit.
ADMINISTRATIVE NOTICE: If you would like to be notified when a client's account is deactivated for violating your cancelation policy, enter your email address (or any email address) in this field. You can also easily find deactivated accounts in Client and Record Management by selecting "View Deactivated Accounts" from the "Area Tools" menu.
"COUNT FROM" DATE: Many centers prefer to give clients a "fresh start" at the beginning of each new scheduling period in that only late cancelations accrued during the current scheduling period would count against the client. If you would like to count only those late cancelations that occur after a specific date (such as only cancelations that occur during the current semester), enter that starting or "count from" date here. To count all late cancelations regardless of date, simply leave this field blank.
REACTIVATE ALL ACCOUNTS...: By selecting "Reactivate accounts deactivated through the cancelation policy." within the introduction of "Cancelation Policy and Enforcement," you can reactivate all accounts that have been deactivated because of cancelation policy violations. Like the previous option, this option can be used to give clients a "fresh start" at the start of a new scheduling period.
If you would like to reactivate a single account, you can do so by searching for the account in Client and Record Management and then selecting "Account Options" from the "Options" menu.
Sections in this Chapter
SECTION 1: Introductory Settings
SECTION 2: General Settings
SECTION 3: File Upload-Specific Settings
SECTION 4: Registration-Specific Settings
SECTION 5: Cross-Schedule Limits
SECTION 6: System Color Settings
SECTION 7: Social Media
SECTION 8: No-Show Policy and Enforcement
SECTION 9: Cancelation Policy and Enforcement
SECTION 10: Access Control
SECTION 11: API Configuration
SECTION 12: Authentication Options
SECTION 13: Language Options
SECTION 14: Zoom Integration
SECTION 15: Zoom Integration (Beta)