User Managed Configuration:
The optimal way to configure WCONLINE’s Zoom integration is allowing your tutor’s and staff to opt into Zoom meetings if that’s their preference. This can be done using our User Managed “OAuth” integration.
To configure the User Managed Zoom integration, you must first have full administrative privileges in WCONLINE. If you do not have full administrative privileges and are trying to connect your Zoom account, then you must first reach out to your full administrator and ask that they enable this option via Global System Settings.
Once in to Global System Settings, click the blue “Area Tools” button on the upper right hand side of the page, and select the option titled “Online Meeting Providers.”
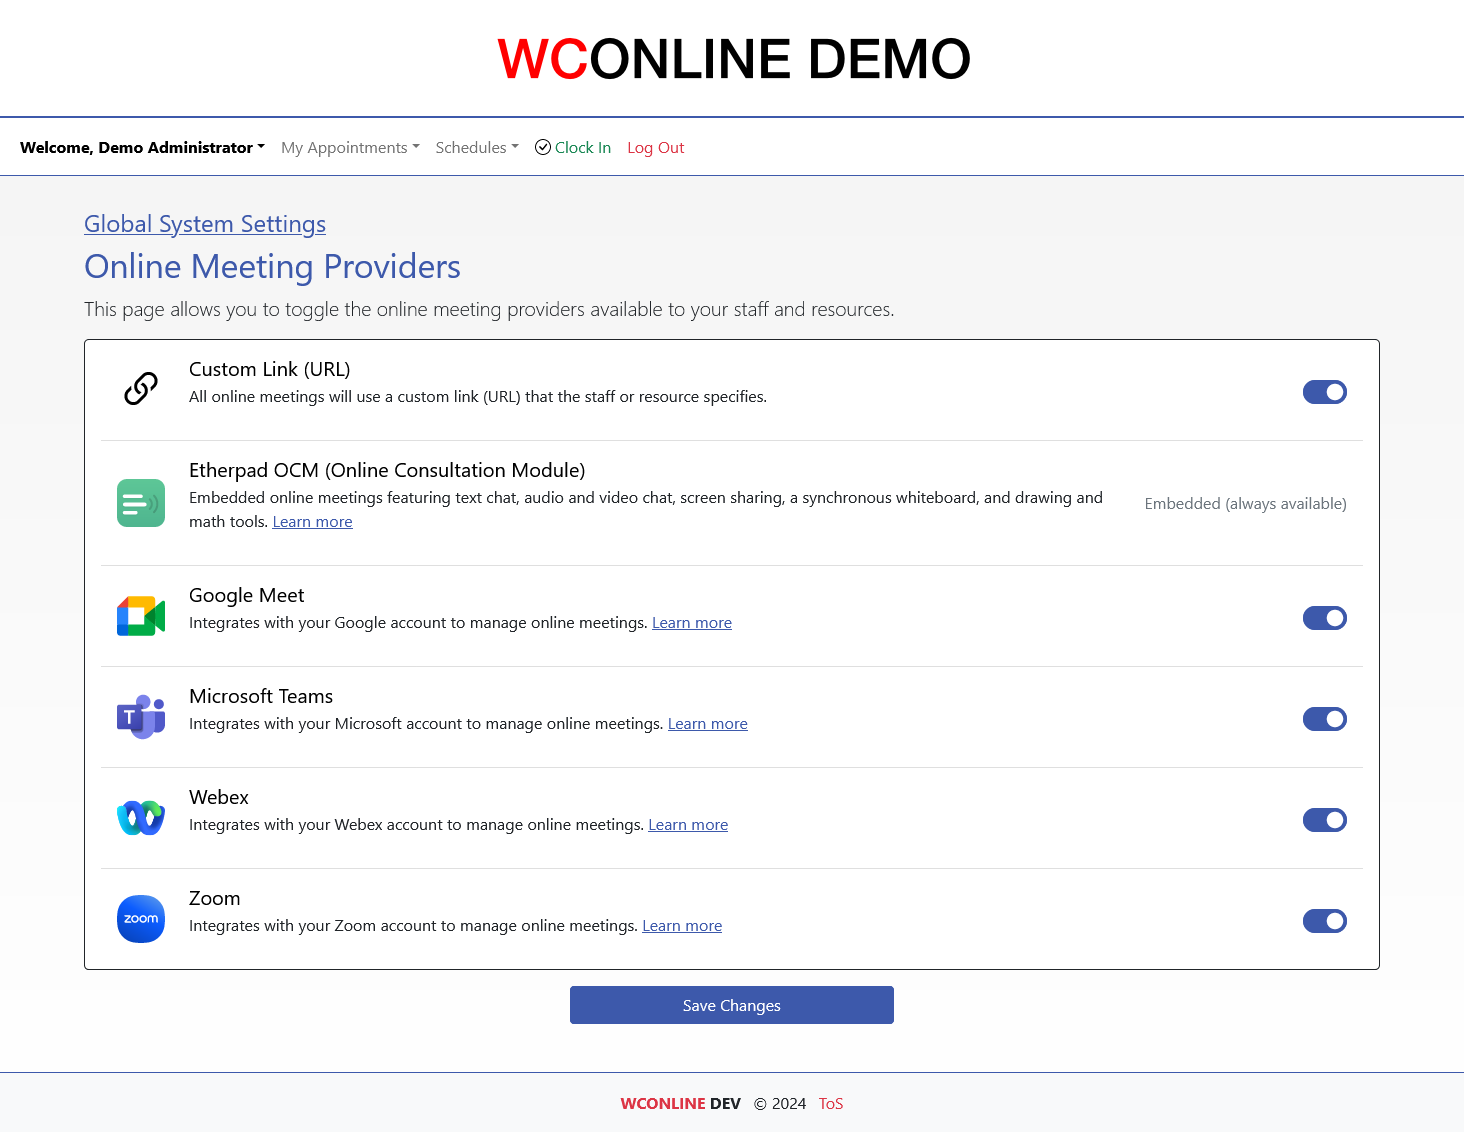
As pictured above, this will present a list of Online Meeting Providers that WCONLINE integrates with. The Custom Link (URL) can be activated to allow your tutors to just paste the link to their Zoom “Personal Meeting Room.” If you choose to go this route, then please ensure your tutors activate the waiting room in their personal meeting room, instructions can be found here: https://support.zoom.com/hc/en/article?id=zm_kb&sysparm_article=KB0059359. This will help ensure your tutoring sessions remain private, and nobody can join early or drop in unexpectedly.
If you choose to setup the full OAuth integration so that each Zoom meeting has it’s own unique URL, then enable the Zoom option by turning the selector to the “on” position.
That’s the extent of the required full administrative actions.
Now, your tutors can go to “Online Meeting Configuration” under the administrative menu. They will be presented with this screen:
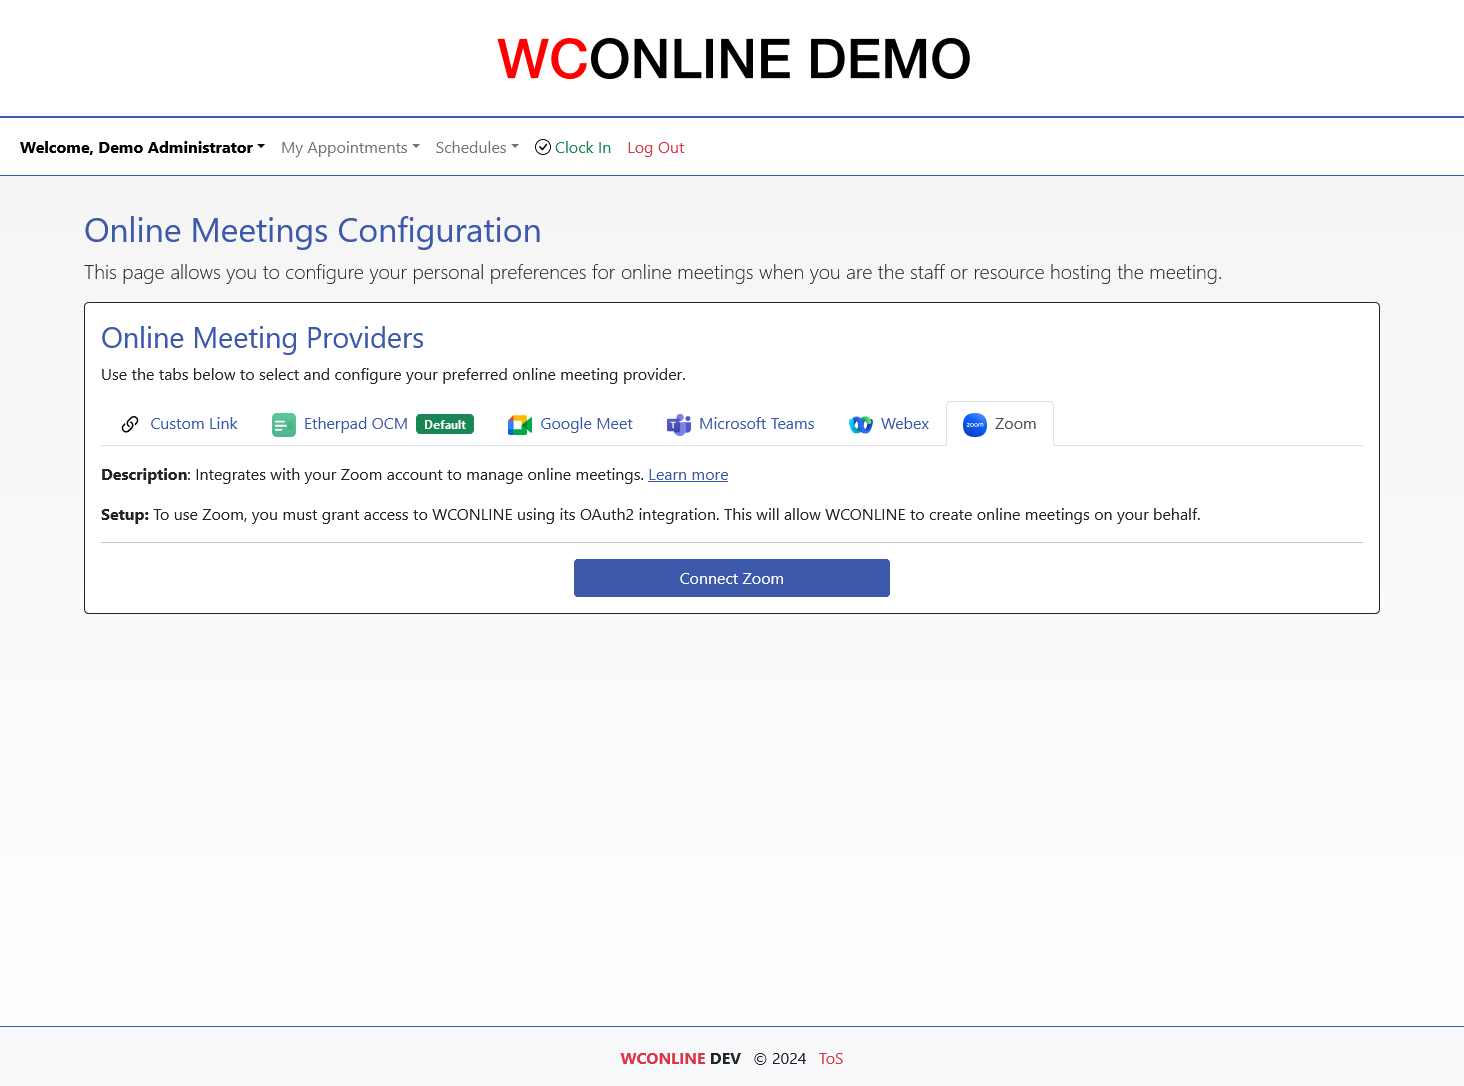
From this screen, you now need to click the blue “Connect Zoom” button. This will navigate to a Zoom login page where you can enter your Zoom credentials, and review the permissions WCONLINE requires to integrate with Zoom. After reviewing the permissions, if you’re comfortable with them, you can click “Connect Zoom Account” and you will be navigated back to WCONLINE.
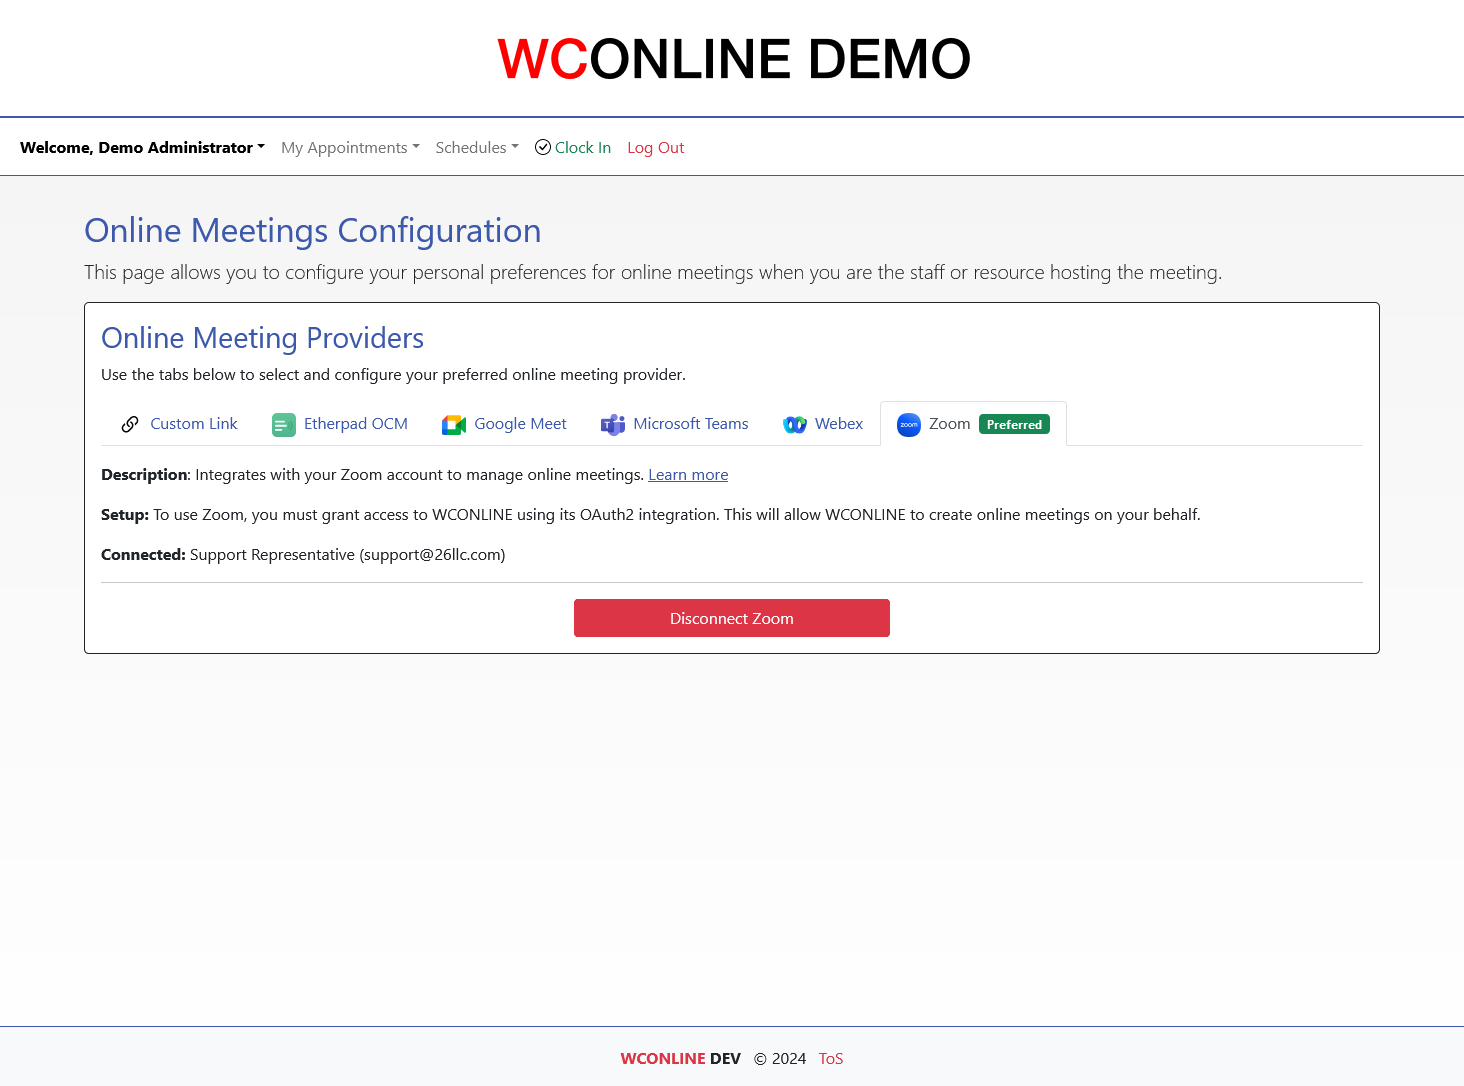
You’ll now see this screen, and your Zoom account is now connected! As long as your Zoom account is connected and set to “preferred,” when students schedule an online meeting with you, it will be hosted in Zoom! This integration fully supports both repeating, and group appointments.
If you’d ever like to disable the integration, then navigate back to “Online Meetings Configuration” from the Welcome menu and click “Disconnect Zoom.”
As always, if you have any questions during the setup process, please don’t hesitate to reach out to our support team. We’re always happy to assist!
Sections in this Chapter
SECTION 1: Introductory Settings
SECTION 2: General Settings
SECTION 3: File Upload-Specific Settings
SECTION 4: Registration-Specific Settings
SECTION 5: Cross-Schedule Limits
SECTION 6: System Color Settings
SECTION 7: Social Media
SECTION 8: No-Show Policy and Enforcement
SECTION 9: Cancelation Policy and Enforcement
SECTION 10: Access Control
SECTION 11: API Configuration
SECTION 12: Authentication Options
SECTION 13: Language Options
SECTION 14: Zoom Integration
SECTION 15: Zoom Integration (Beta)